
Aesthetic Pantry Organization Under $150
I always drool over those perfect Pinterest pantries — matching glass containers with wooden tops, cute vintage labels, and baskets of fruit, with plenty of space to spread things out. But every time I’ve tried to go and recreate the same thing, it comes out about $2,000 over budget. Cute storage is not cheap!
I really wanted to come up with a way to make our pantry stay organized and look nice with a bigger budget than “random storage I found around the house” but a smaller budget than “Pinterest mom goals.” I settled on a $150 budget, ended up actually spending $141, and I’m pretty happy with how it turned out! I would love to have more of each type of container I bought, so I think I’ll keep gradually adding to the collection, but at least this is a start.
I’m curious to find out how practical it will be to have things out of their labels, and have containers to refill etc. I love the idea of it feeling super clean and minimal without labels, but I will keep you posted on how it goes from a practical stand point!
Here is what it looked like before and after…
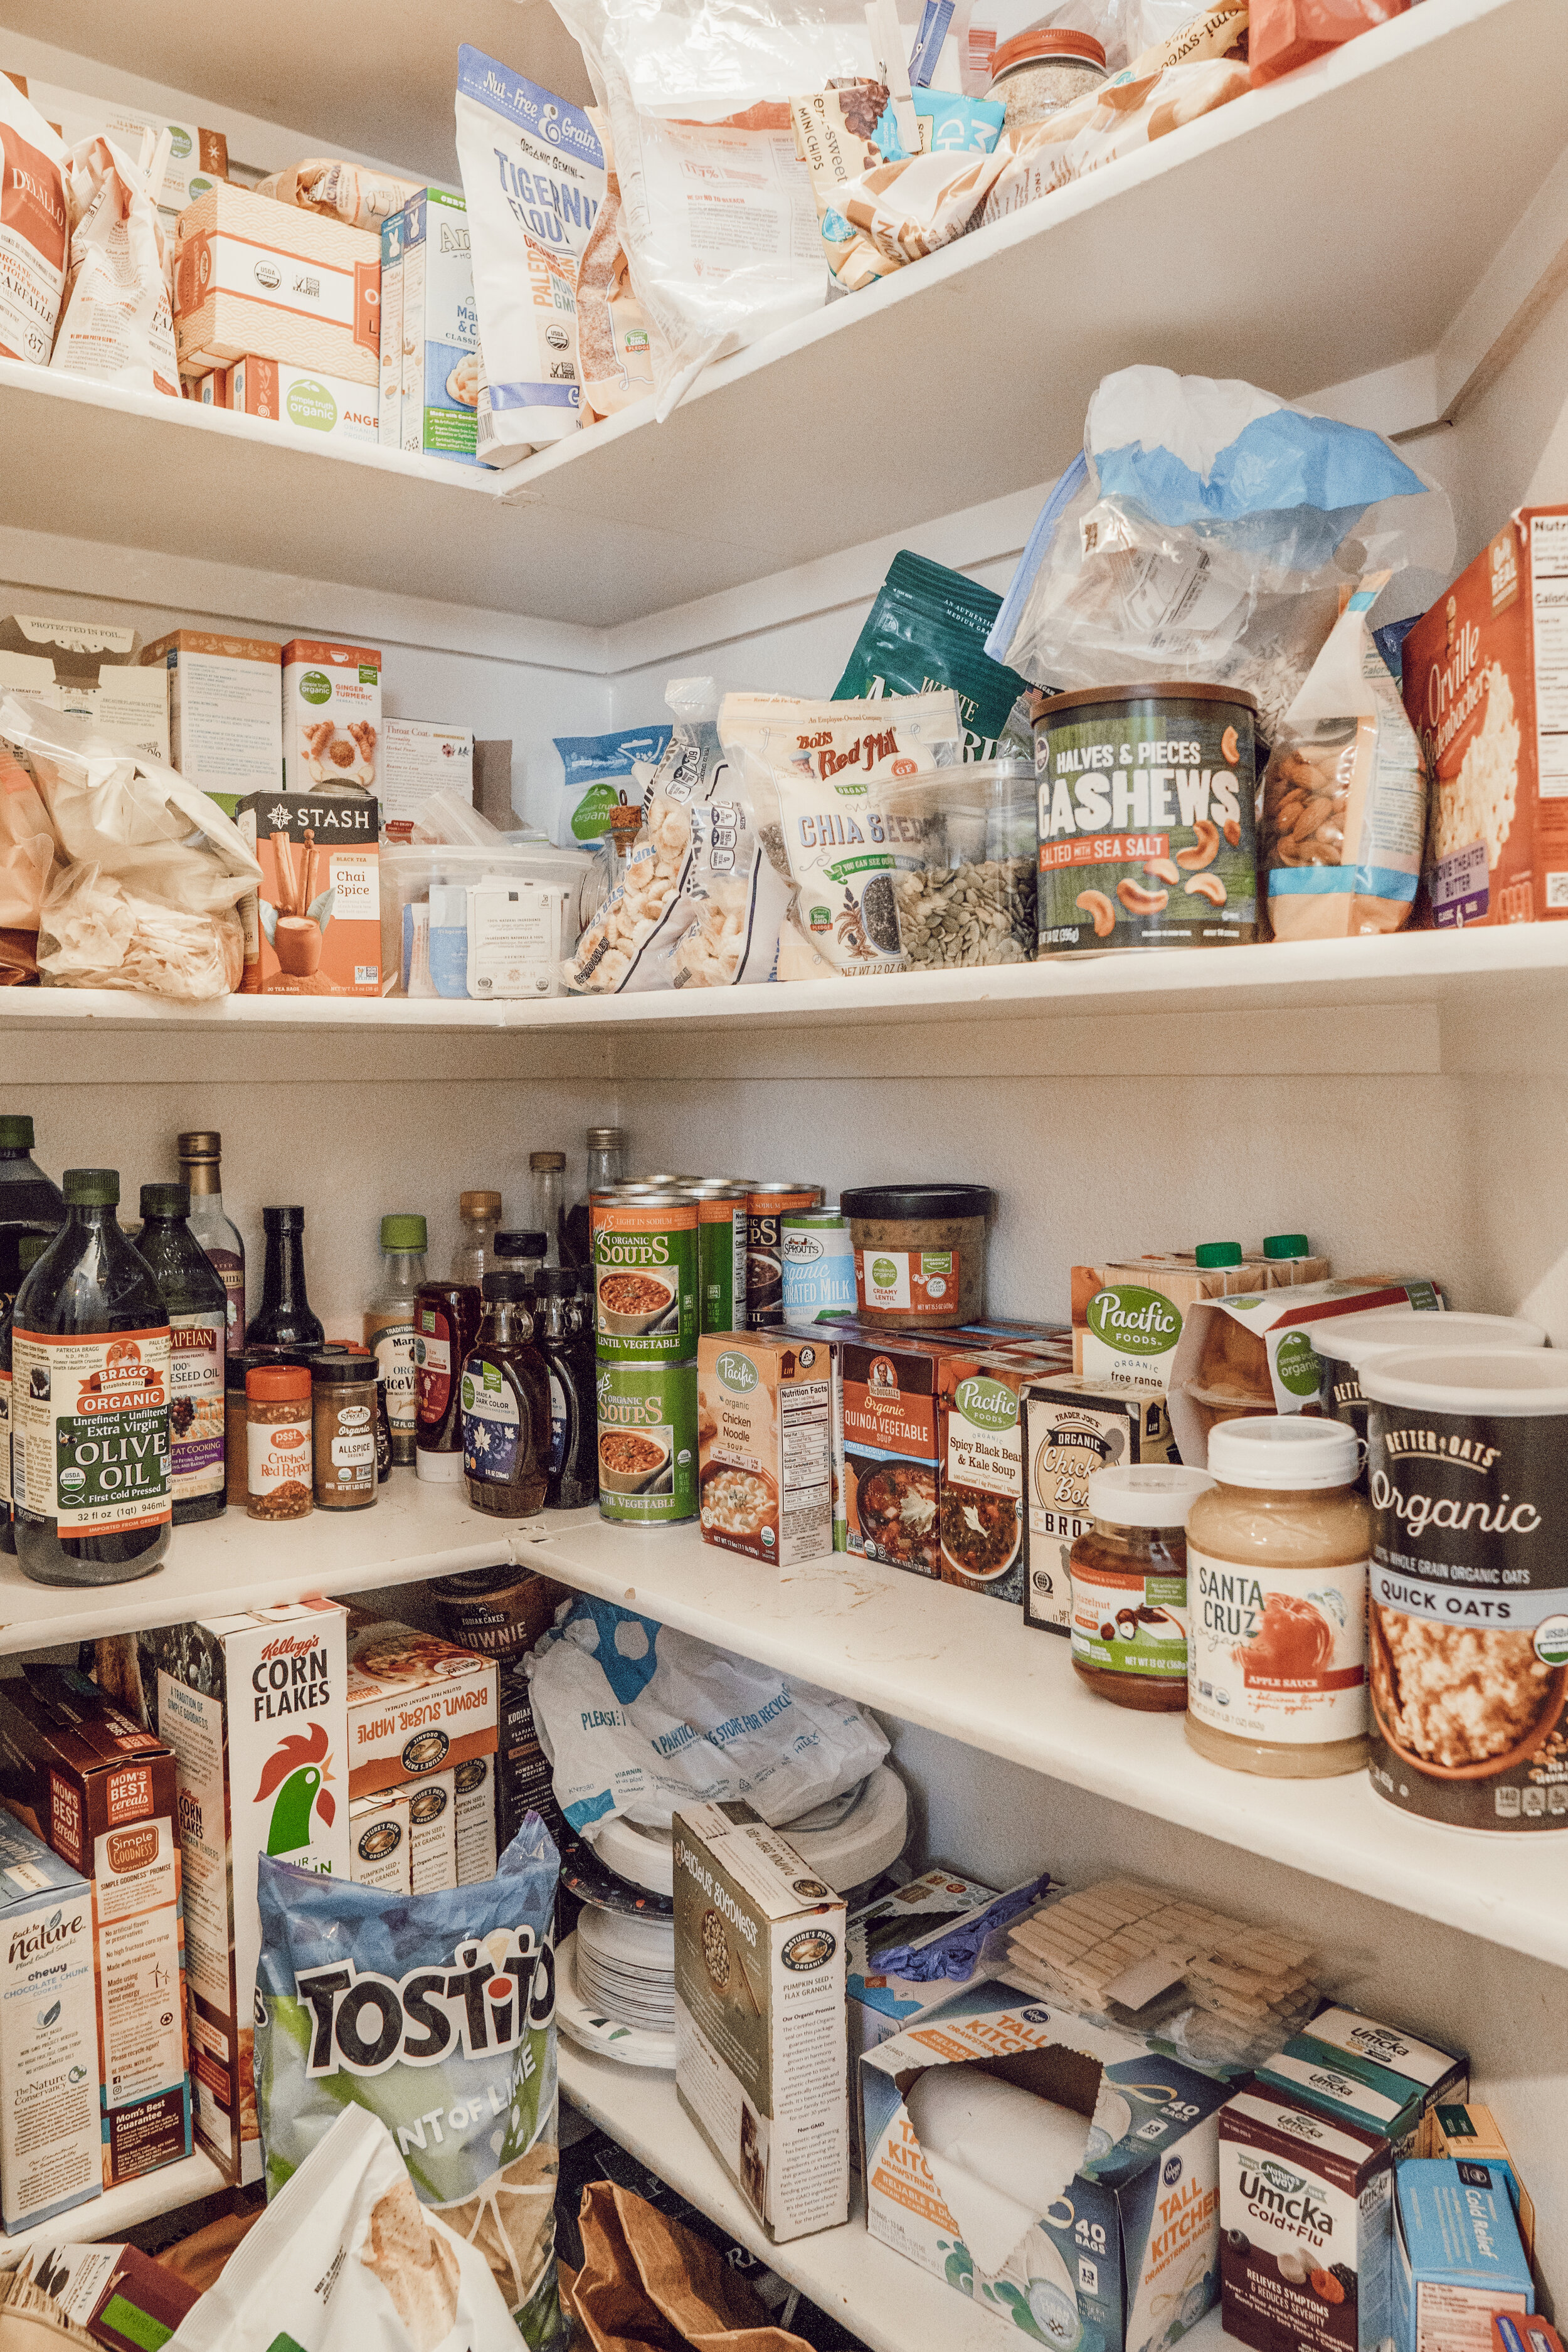
before
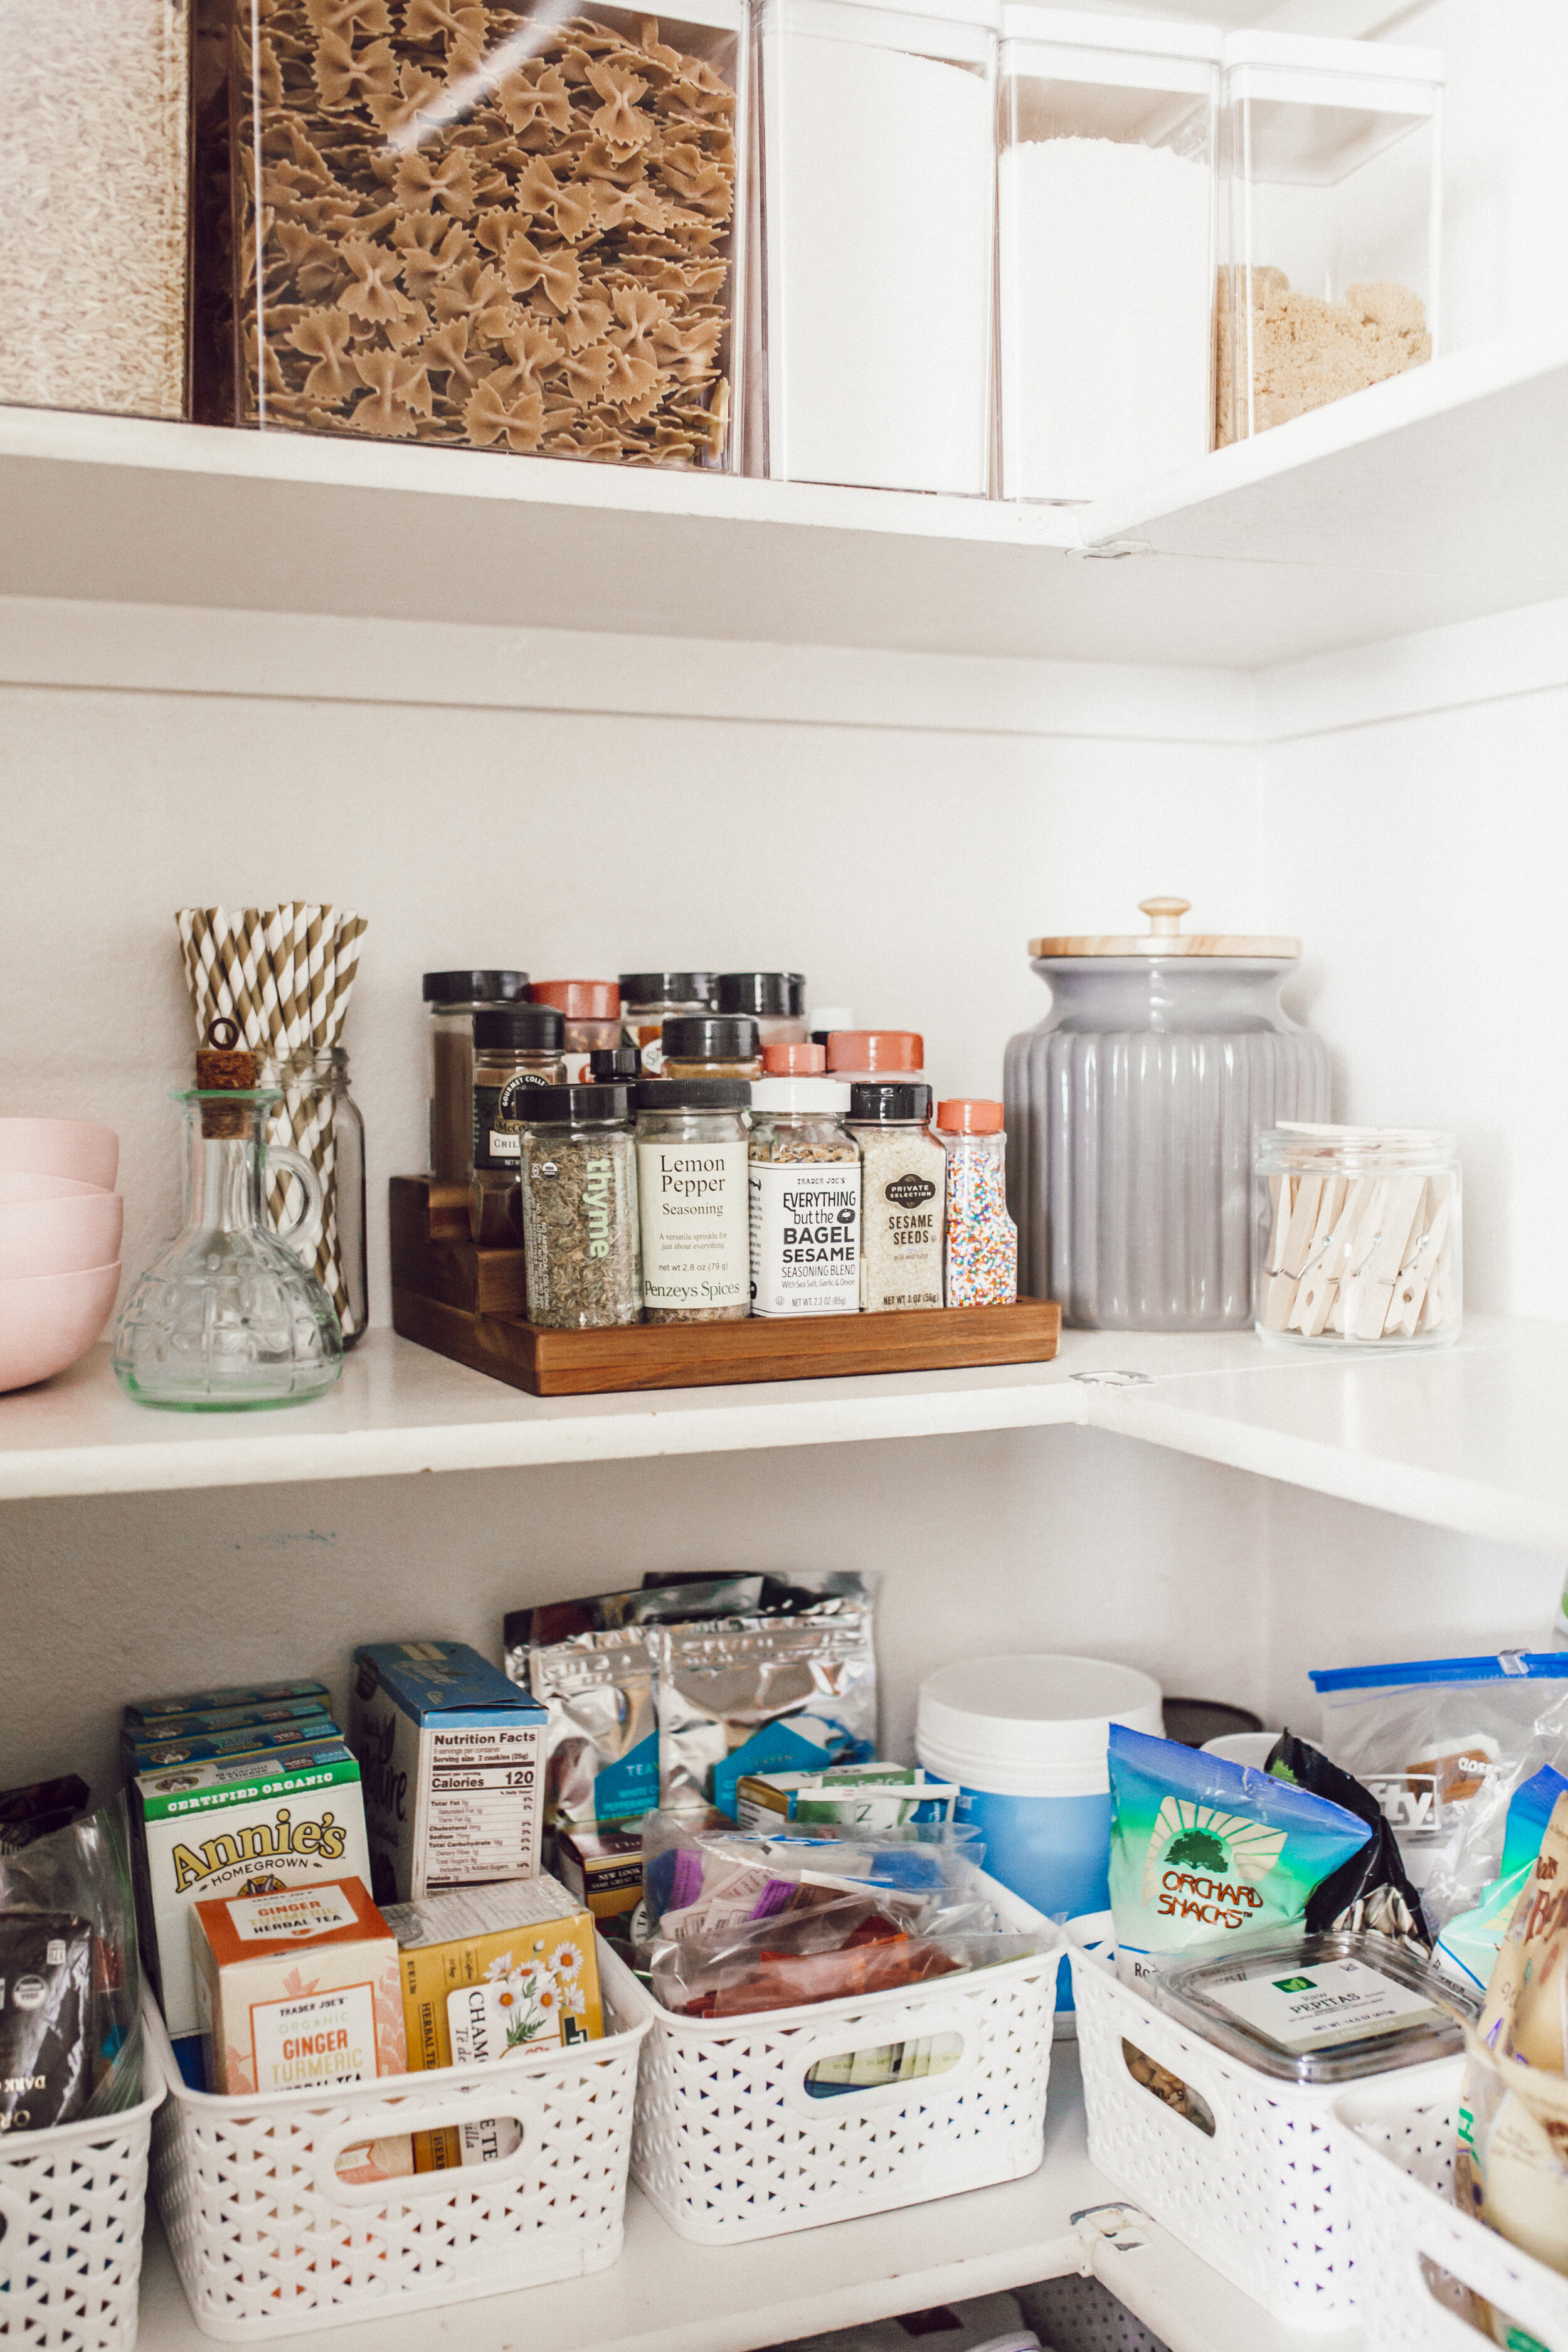
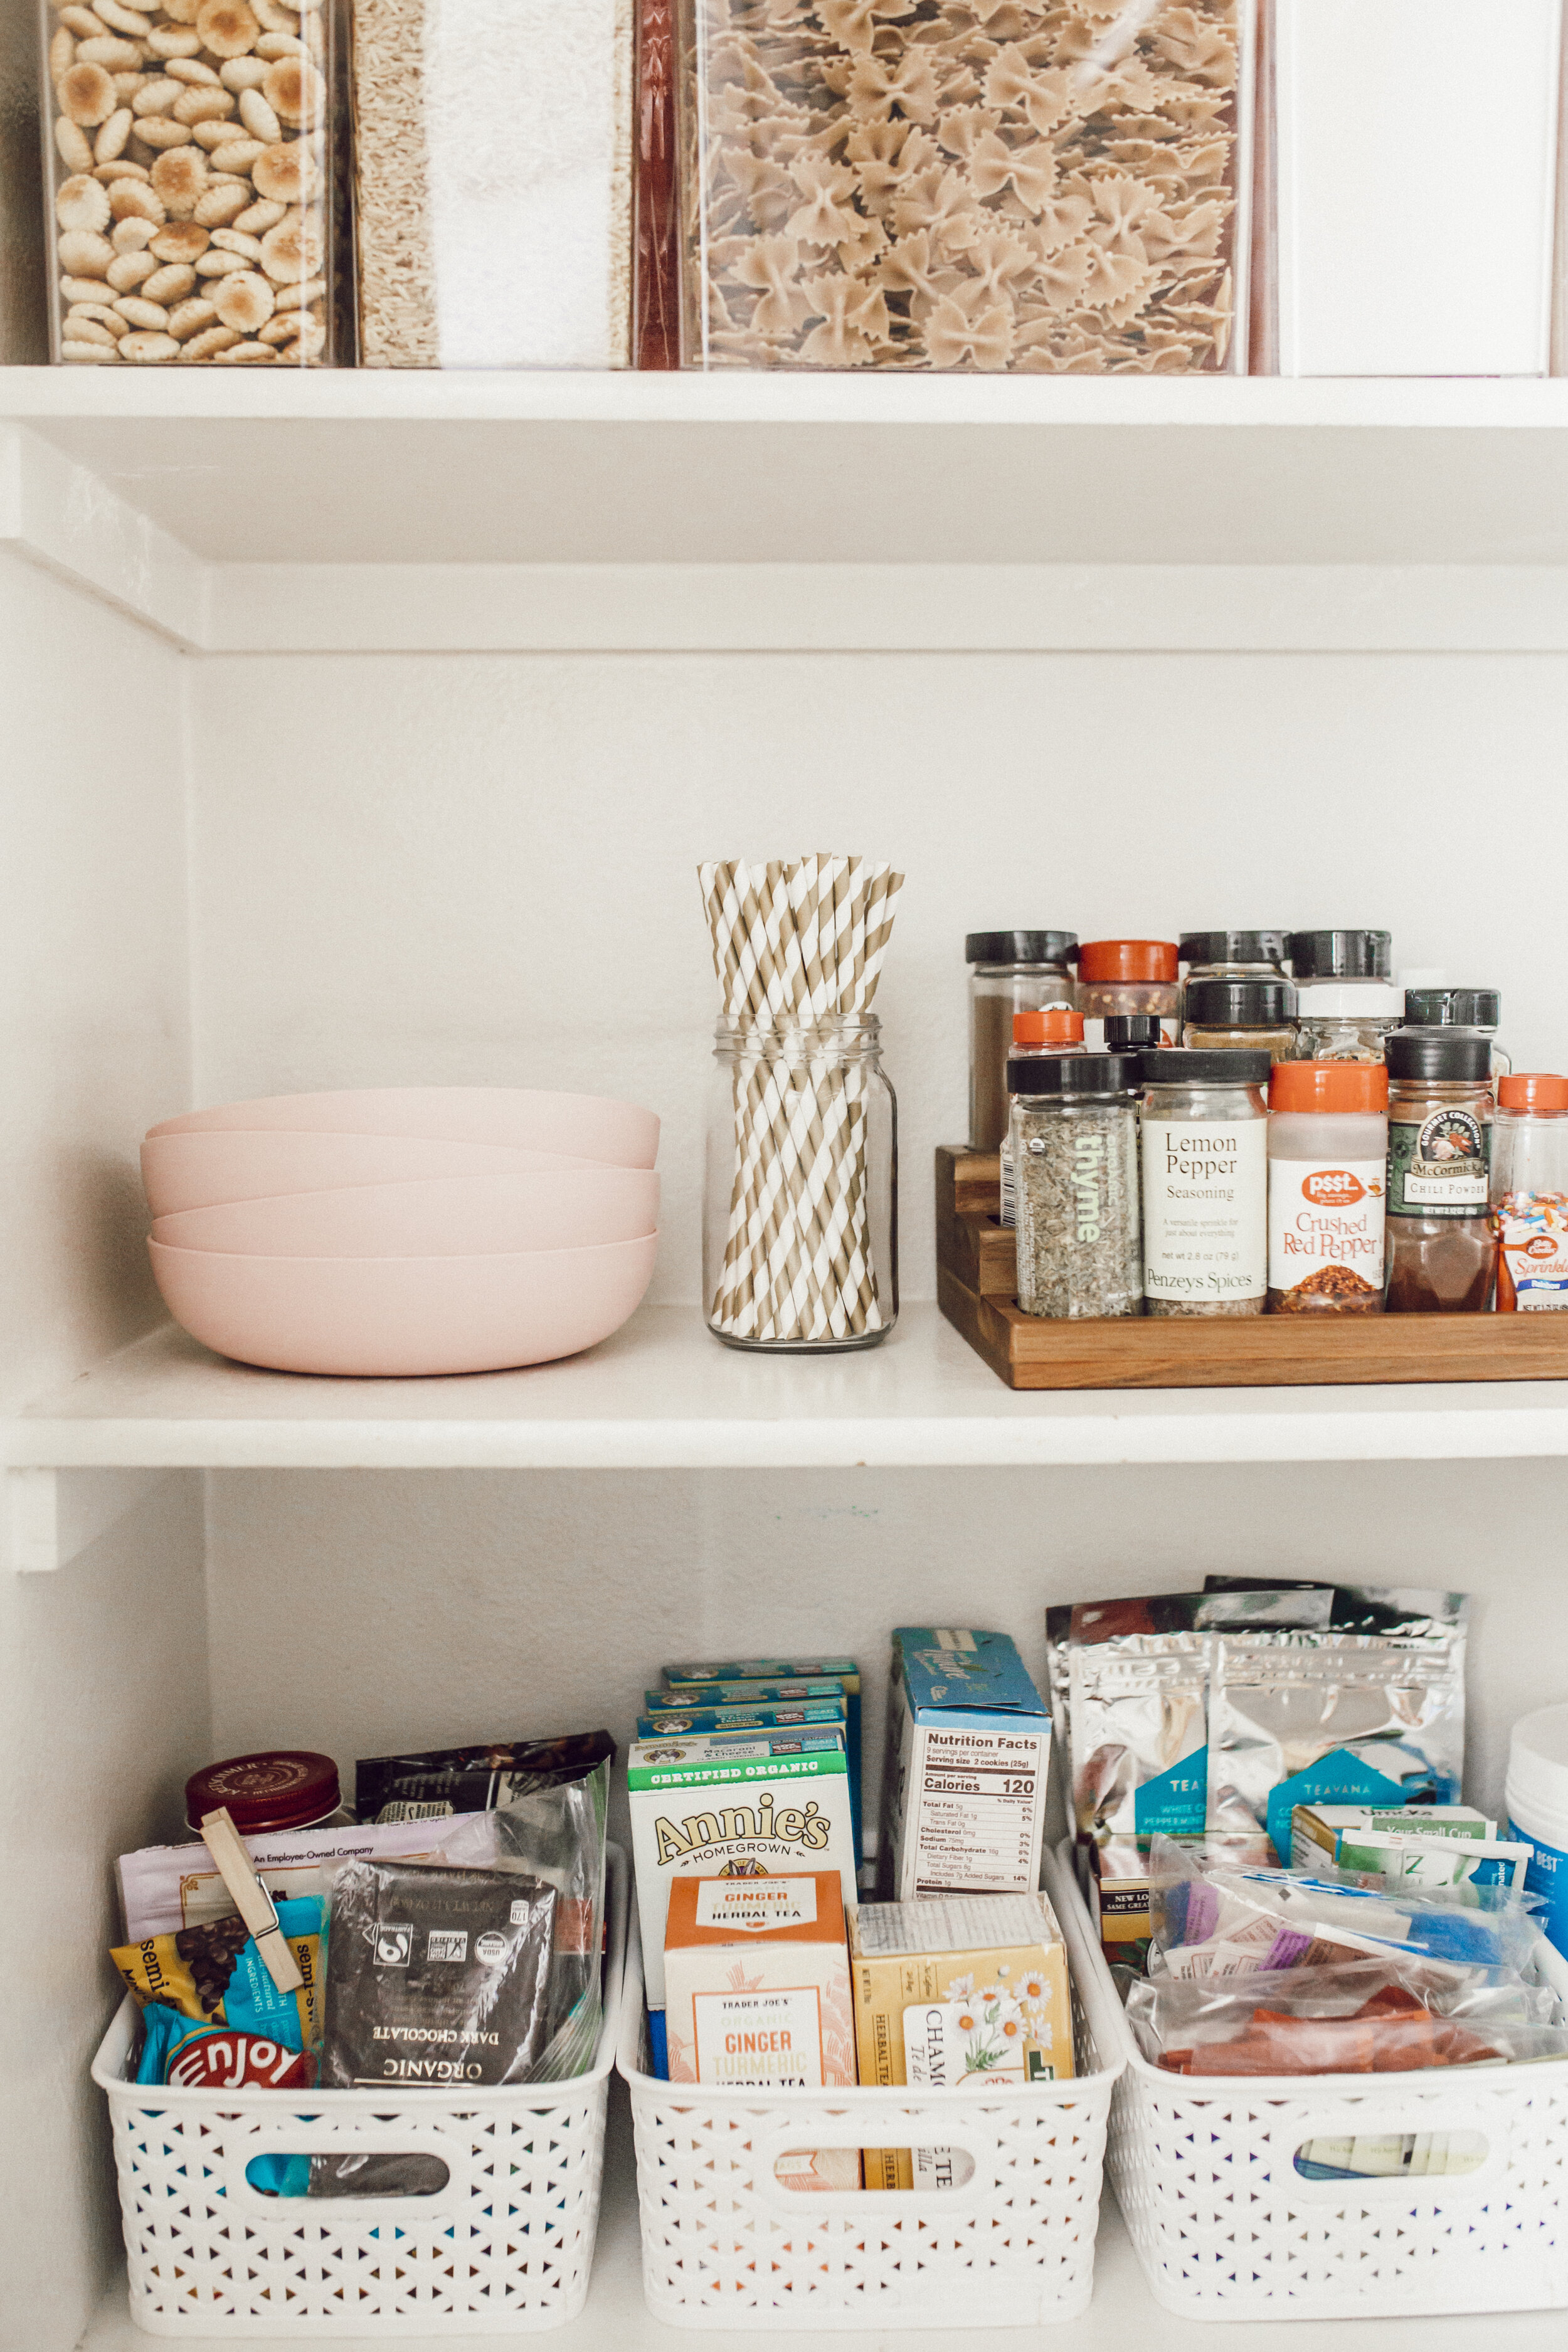
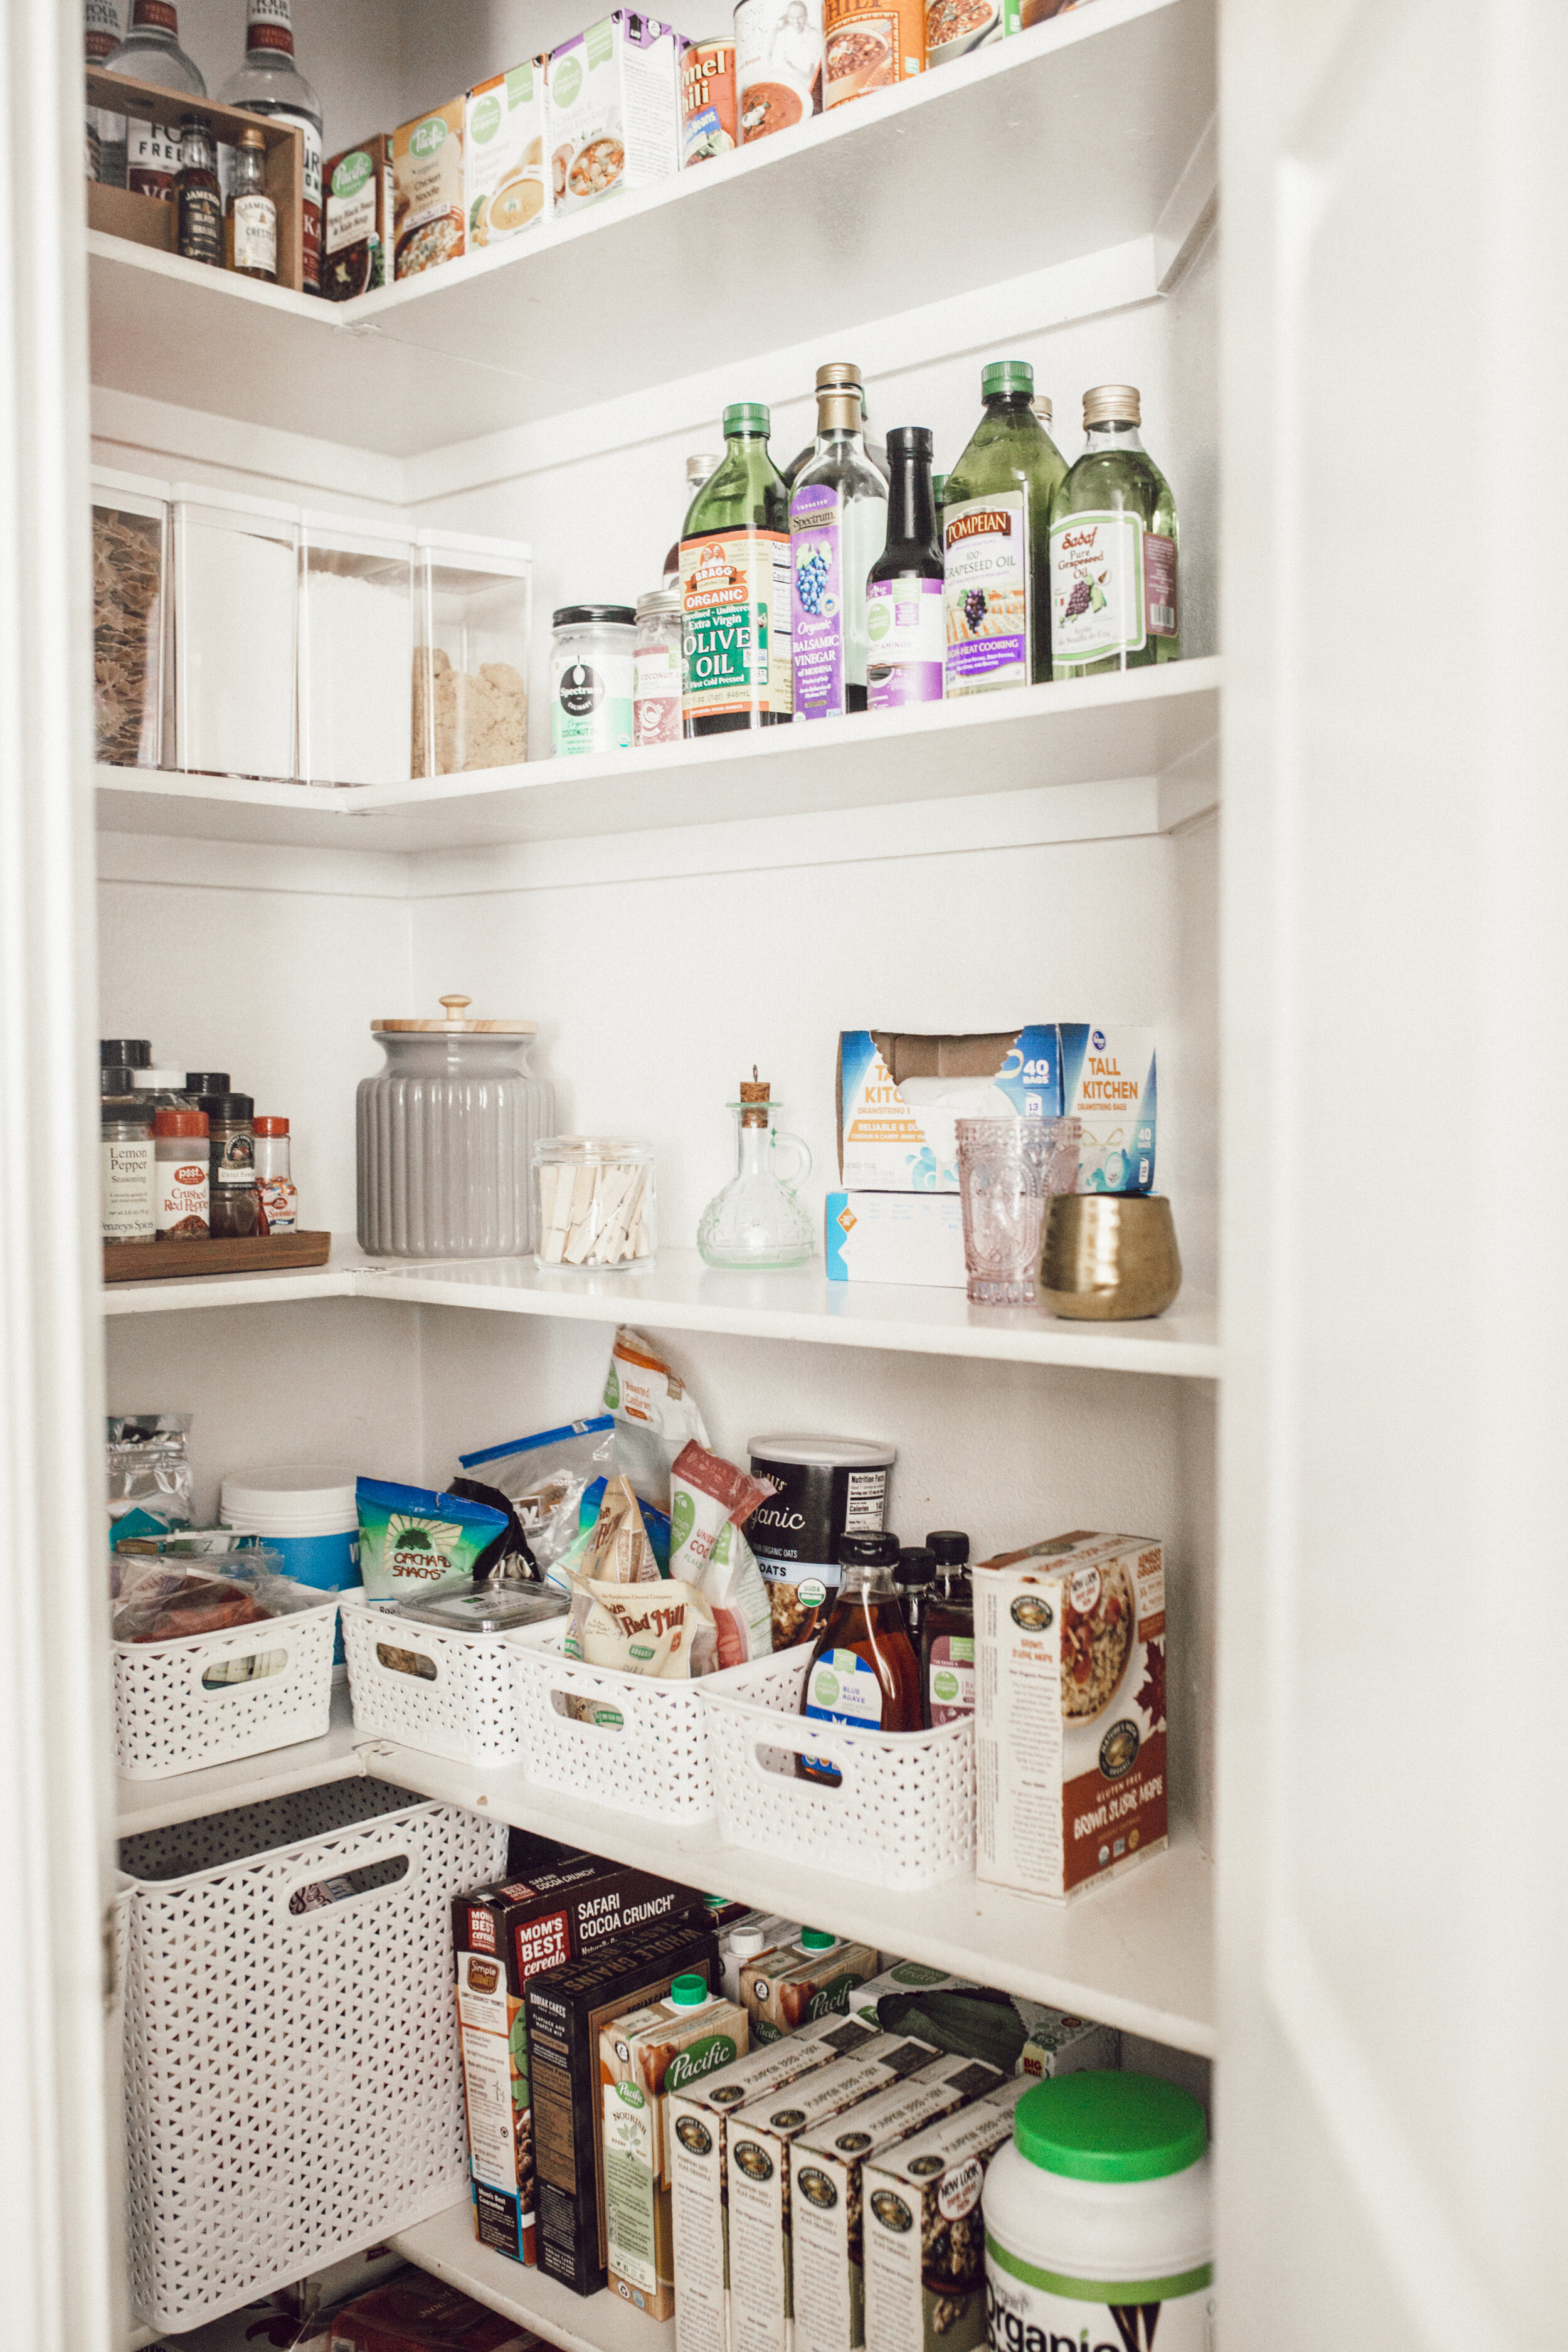
after!

Here are the main things I did to make the pantry feel cleaner and look nicer:
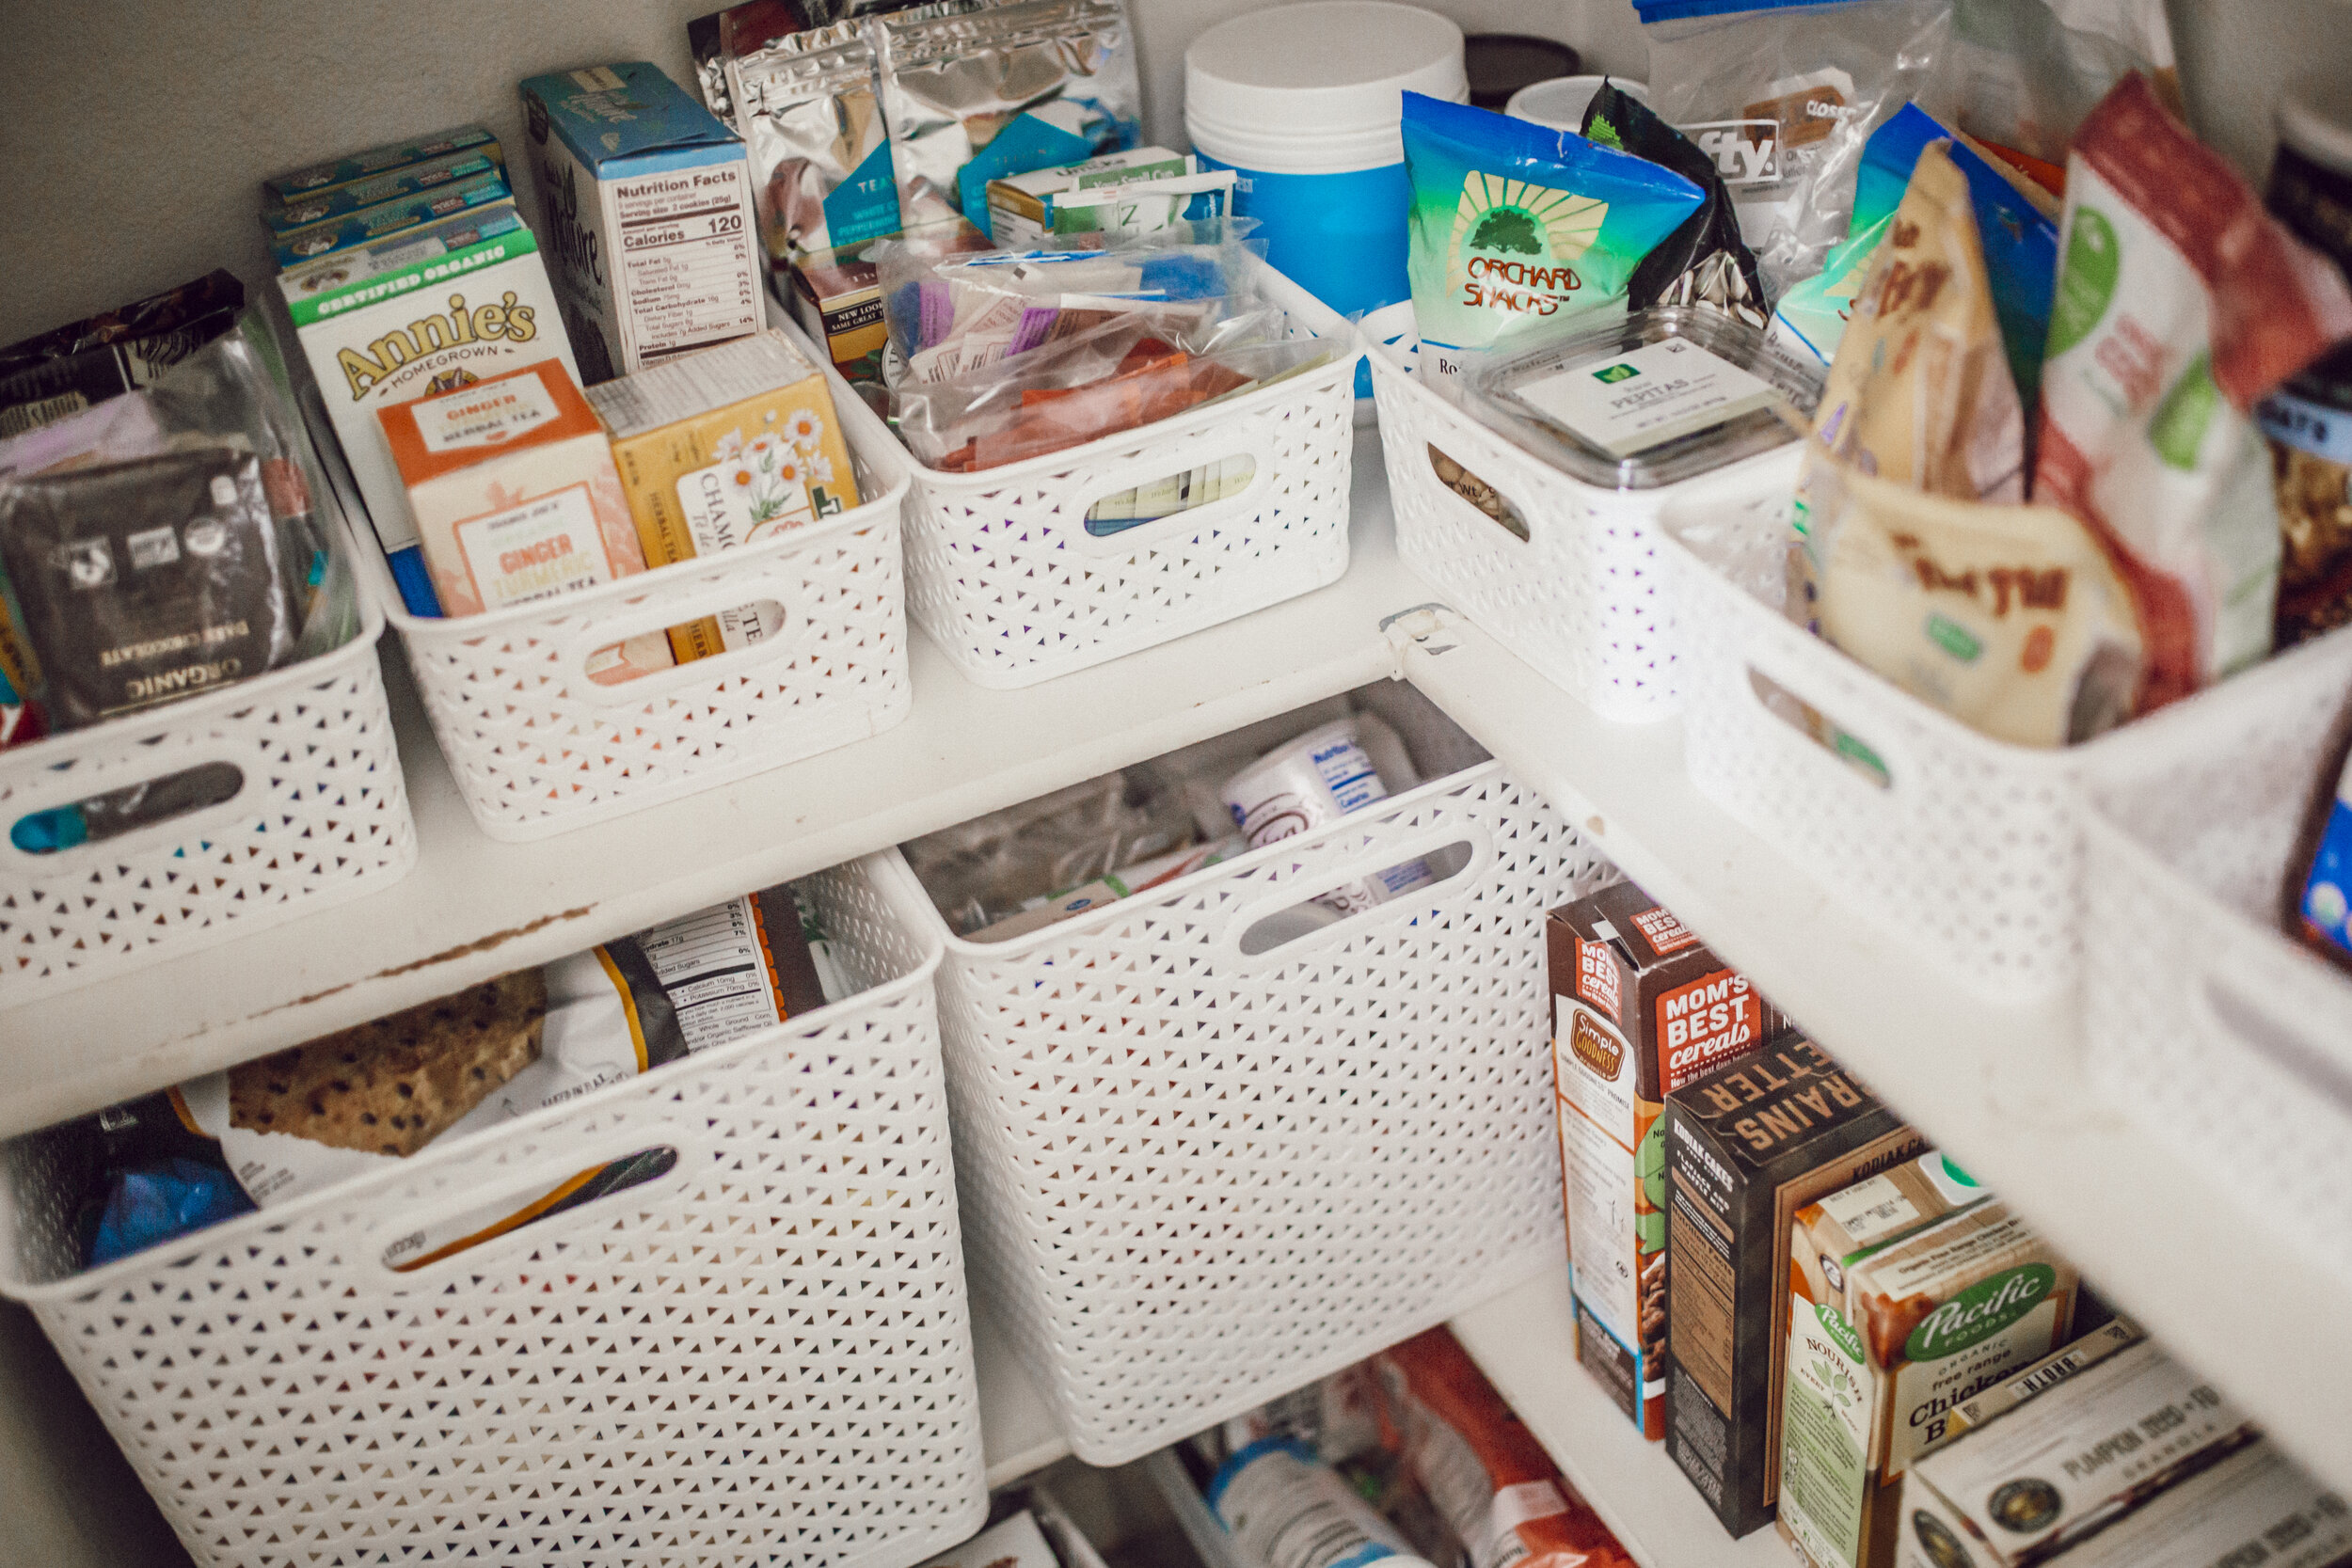
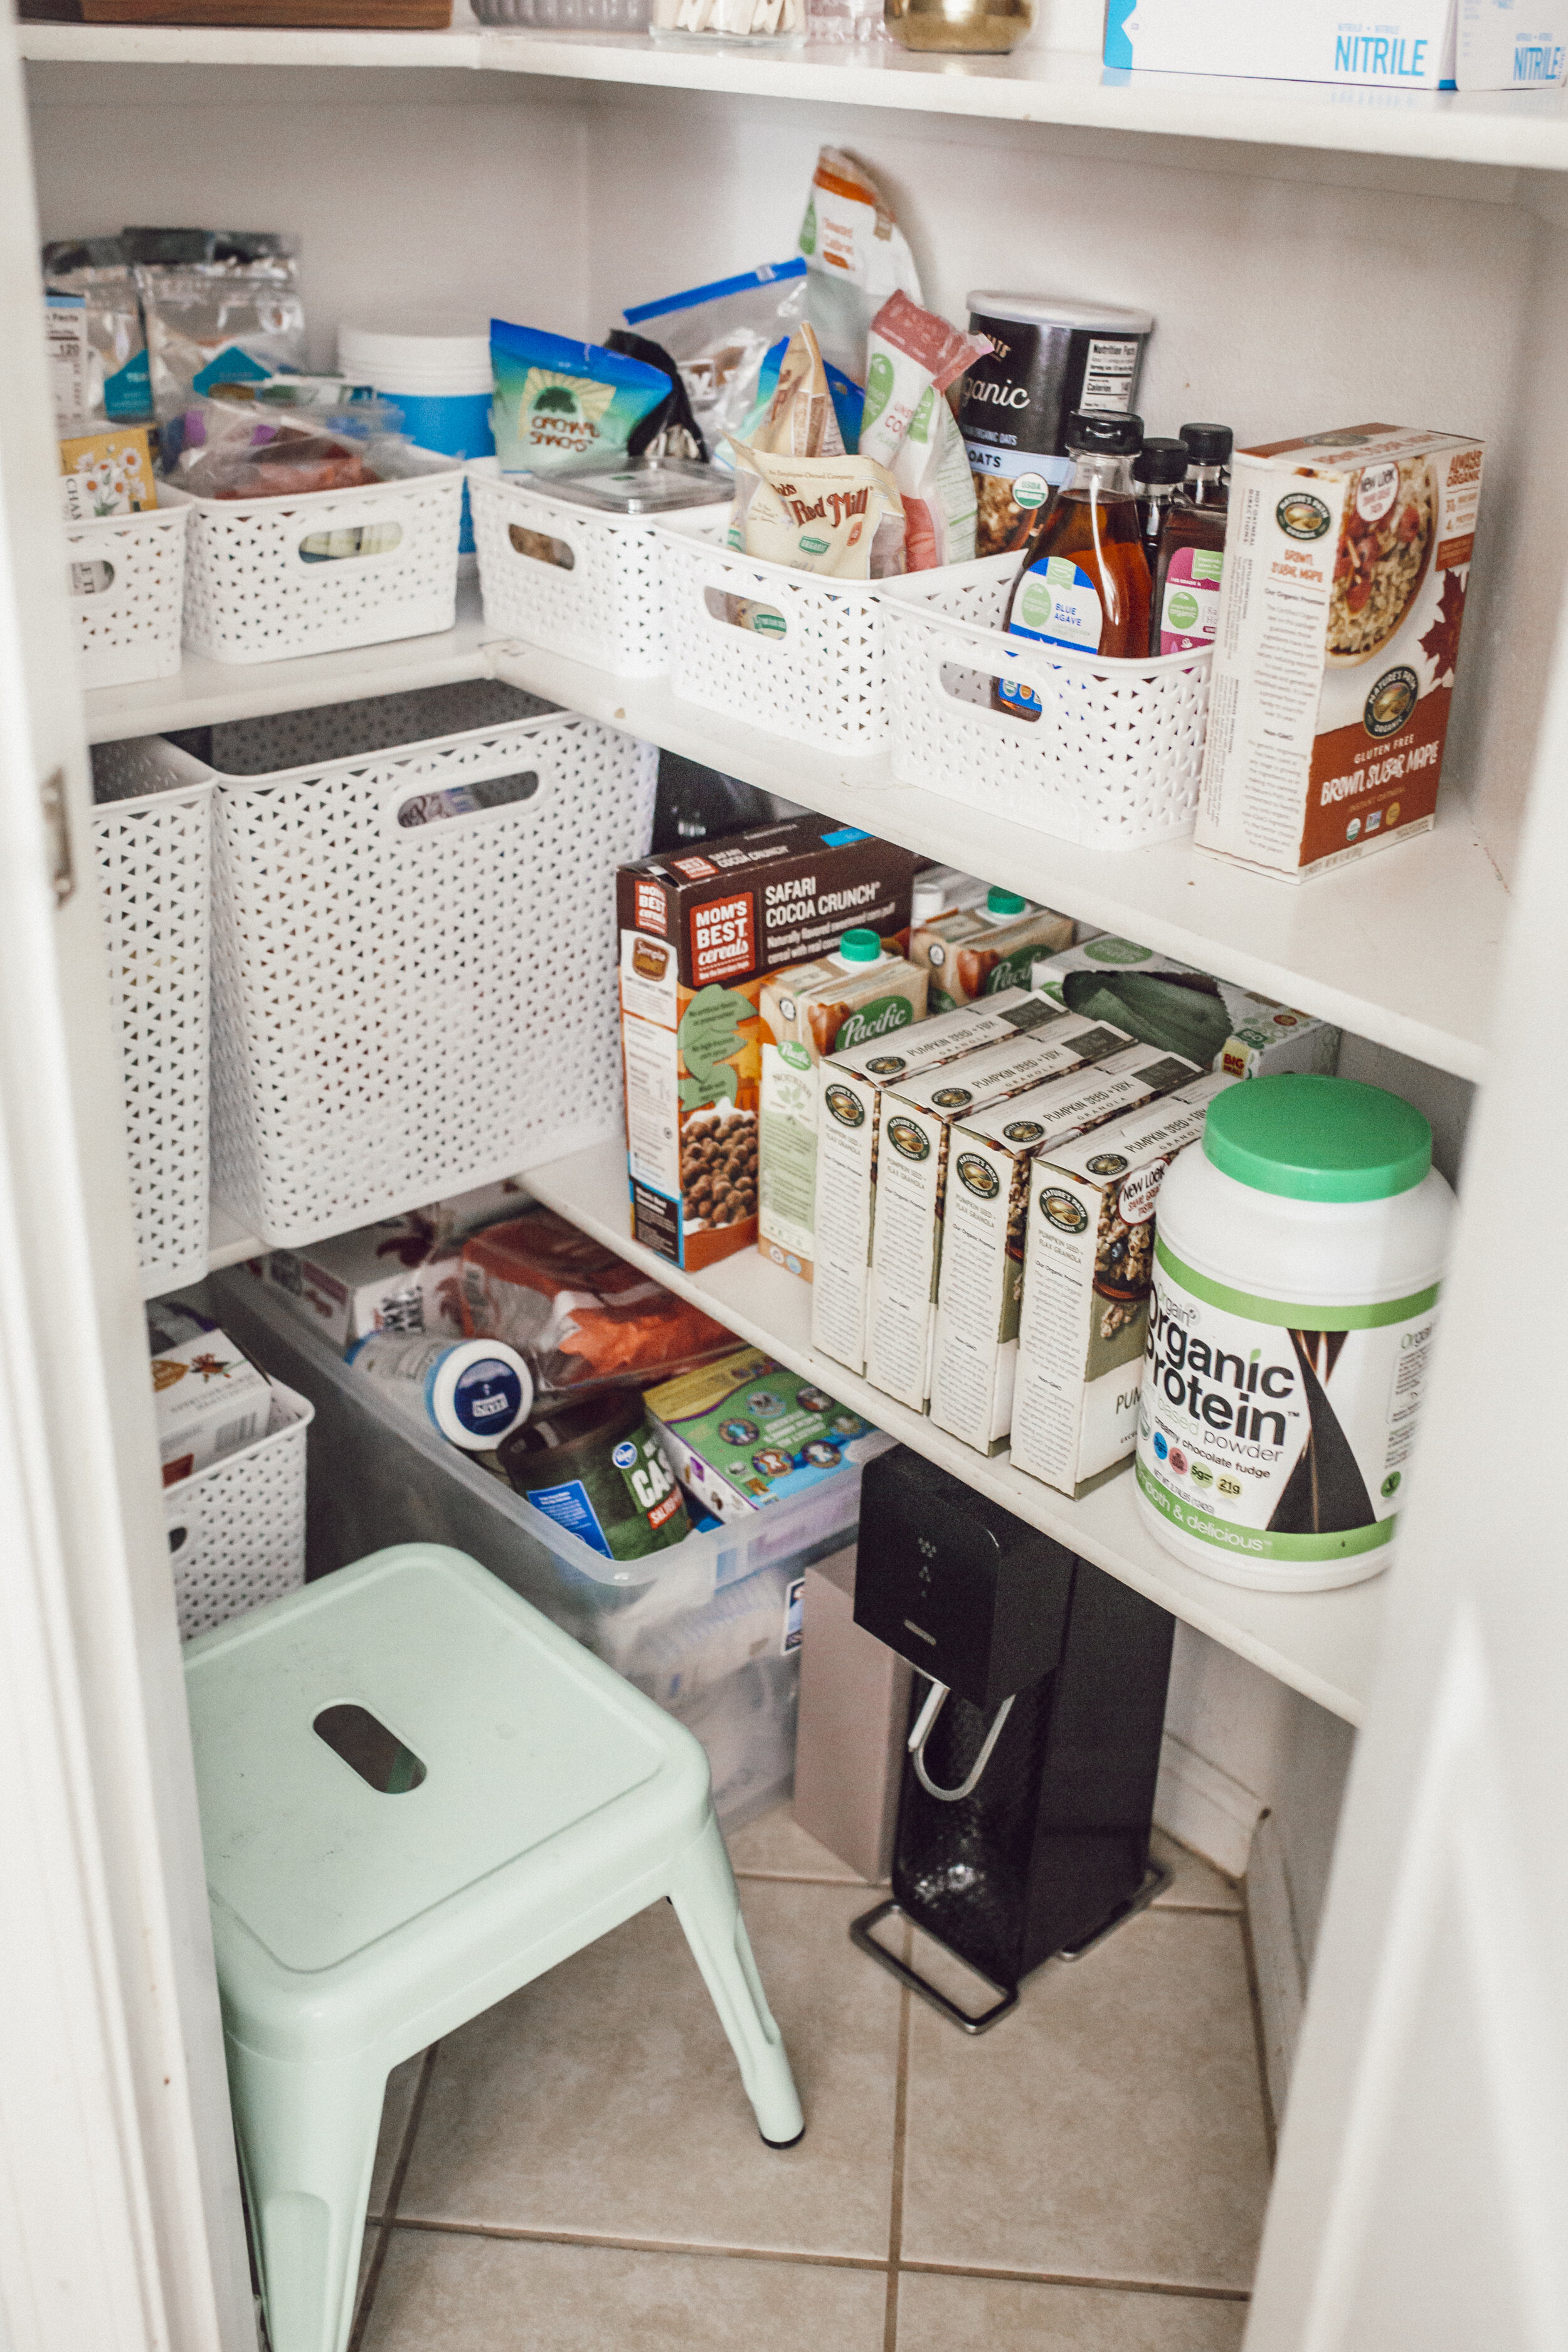
I filled the pretty clear containers with dry goods. This is my favorite part aesthetically, and I plan to collect more of them over time.
Store any “extra” containers of things in one bin below, sort of like I store winter clothing in the summer. Almost everything on the shelves now is open and in use, and everything being stored as a back up is in the bins on the floor.
Sort items by use: I now have a bin of disposable flatware, plates, a bin of chips, a bin of smoothie ingredients, a bin of tea, a bin of baking items, etc.
Added a few unnecessary cute items just to make it feel decorated. The gray canister is filled with granola bars.
I realized as I cleaned everything out that there were several things we had been storing in the pantry that didn’t really need to be in the panty, so I moved some items into other parts of the house to make more space. I also threw out some expired items.
A few notes/tips:
Make sure you measure your pantry before you shop! There are a lot of cute containers out there that would have been terrible in my pantry size-wise, so I’m really glad I checked ahead of time.
Add expiration dates on anything you remove from the packaging. I did this on the back using masking tape and a sharpie.
The containers I got for dry goods didn’t hold nearly as much as I actually keep on hand. The ones I got are good for a more affordable start, but ideally it’d be better to have bigger ones.
You can tell the containers I got are cheap, so if you have a bigger budget I wouldn’t recommend them, but they are perfect for what I need right now! The little white baskets bend up in the middle, and the clear containers all came scratched on one side (though they did give me a refund on all of those scratched items which was great!). I’ll still probably buy more again.


I definitely don’t feel like this is my dream perfect pantry, but it feels much better than it did before! Here are links to shop everything I purchased:
Big White Baskets ($8)
Small White Baskets ($4)
Gray Canister ($15)
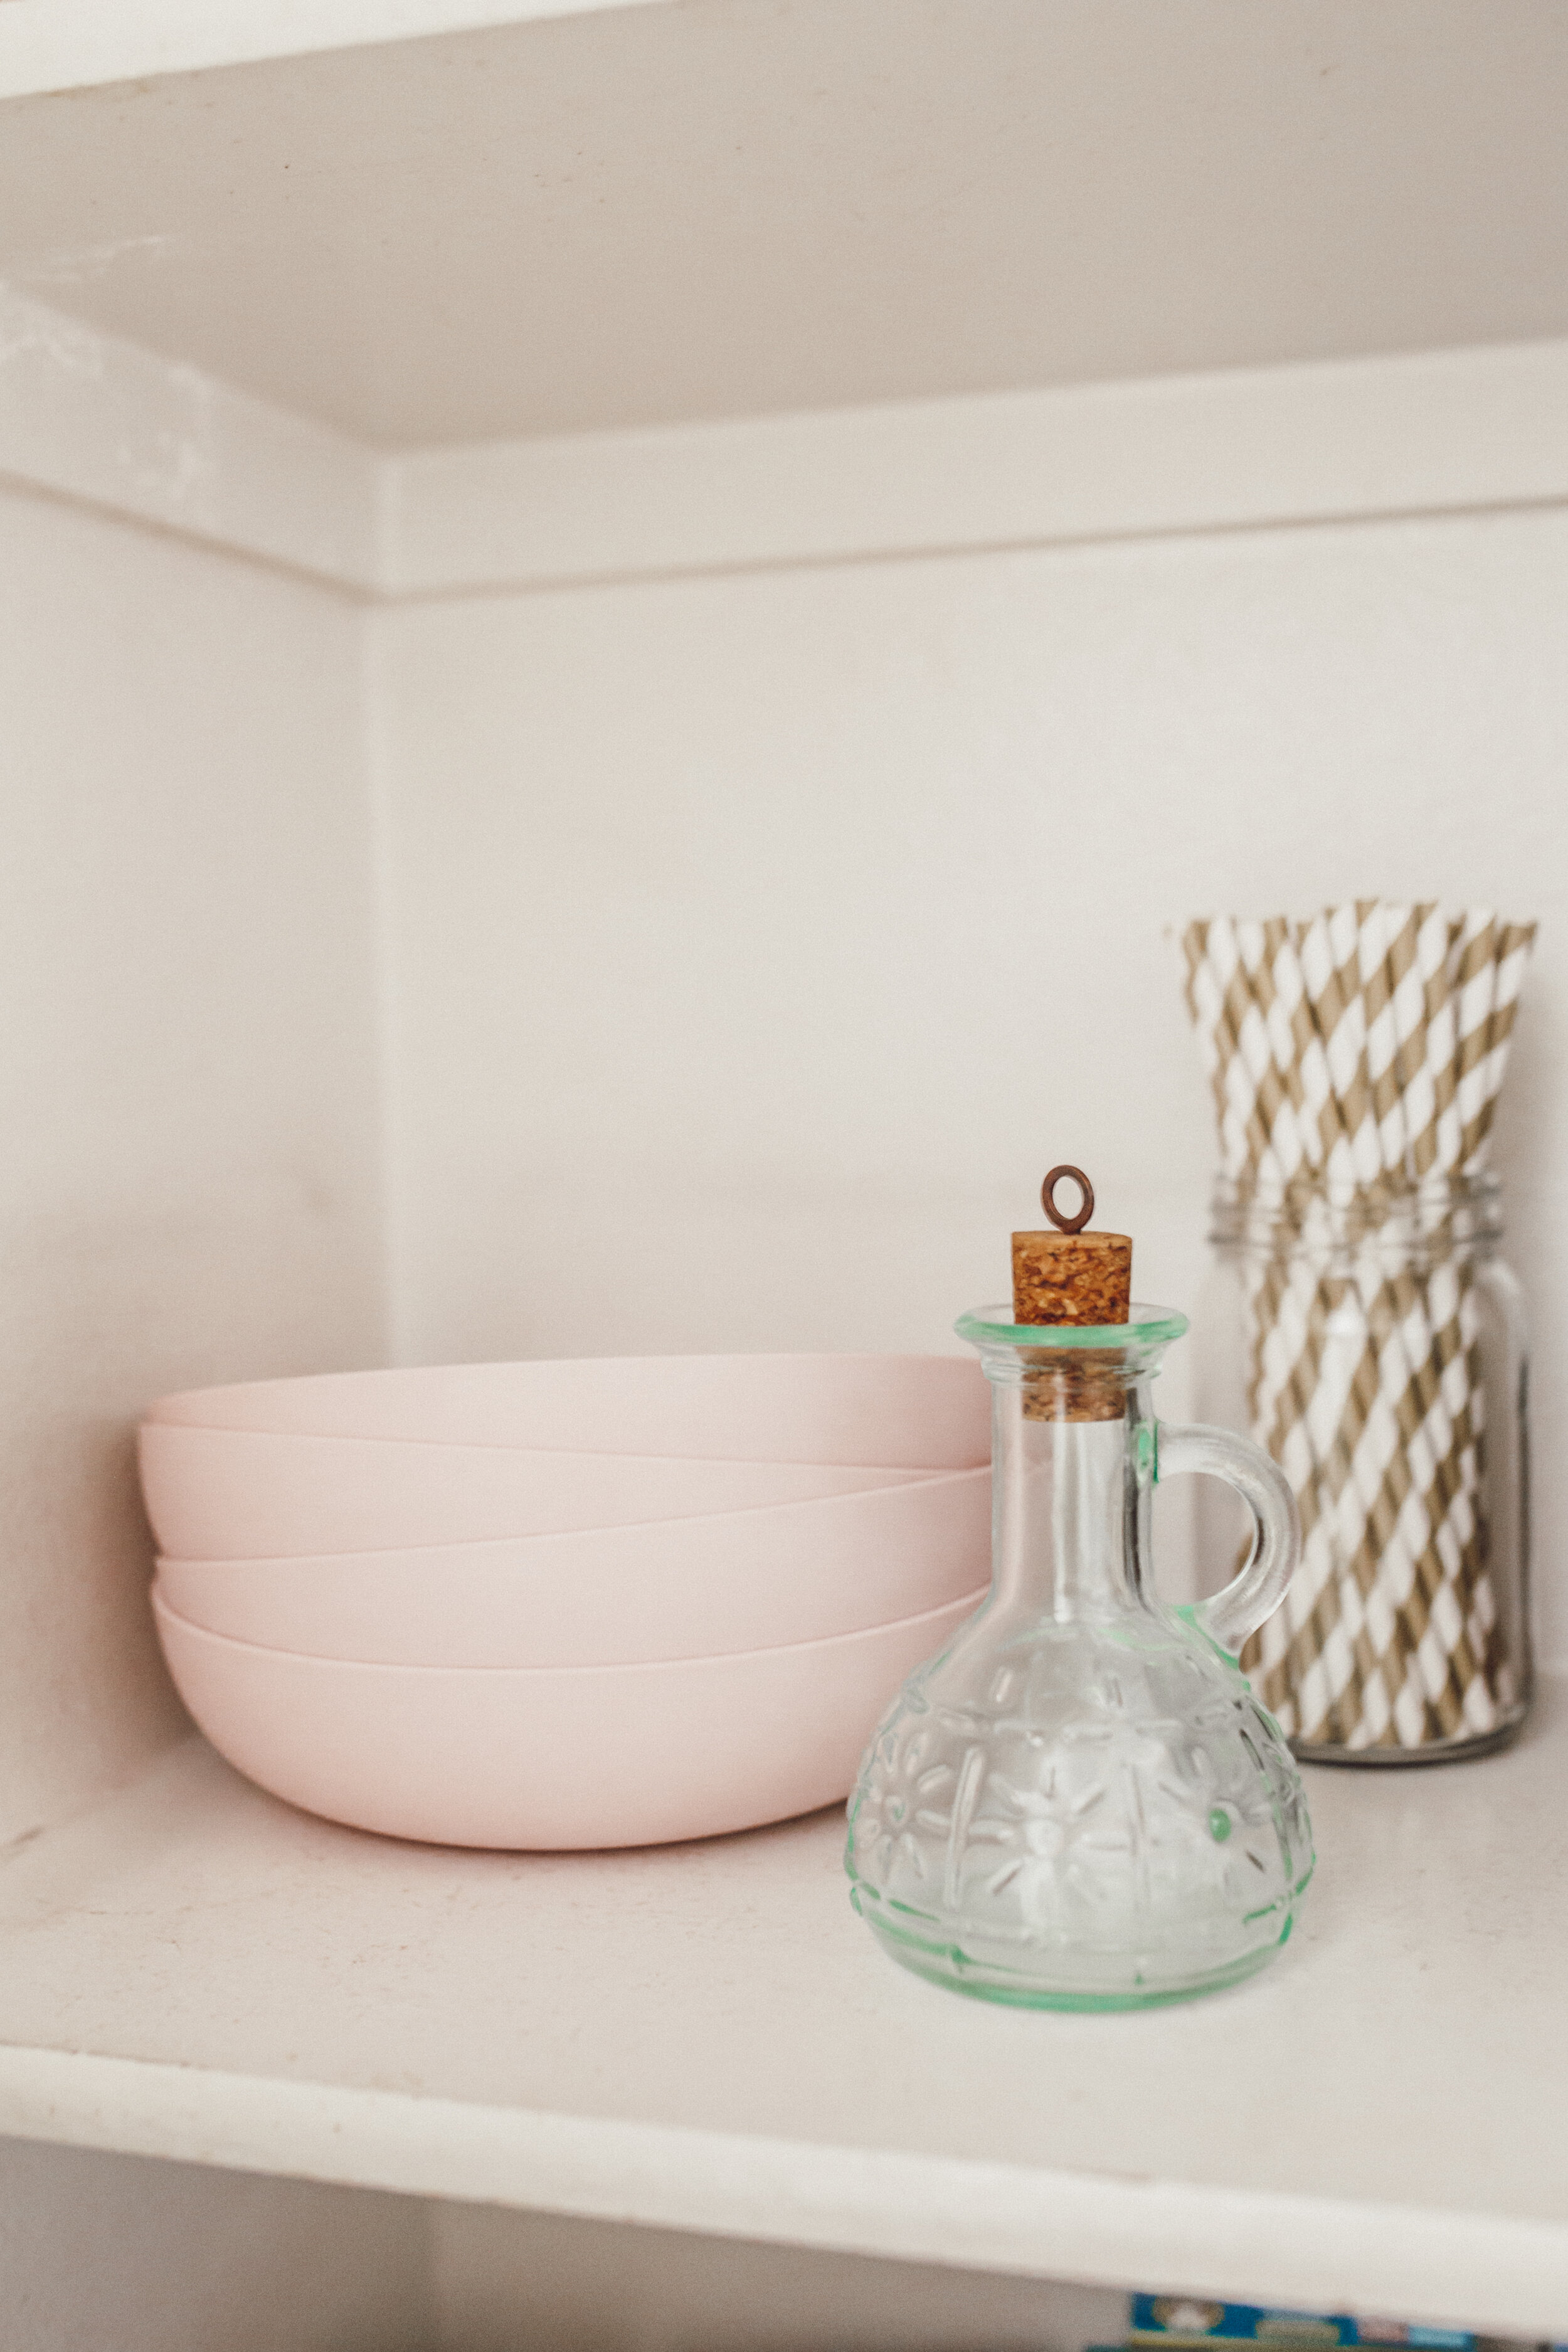
Pink Patio/Plastic Bowls ($0.79)
Big Clear Containers ($10)
Wooden Spice Rack ($20)