
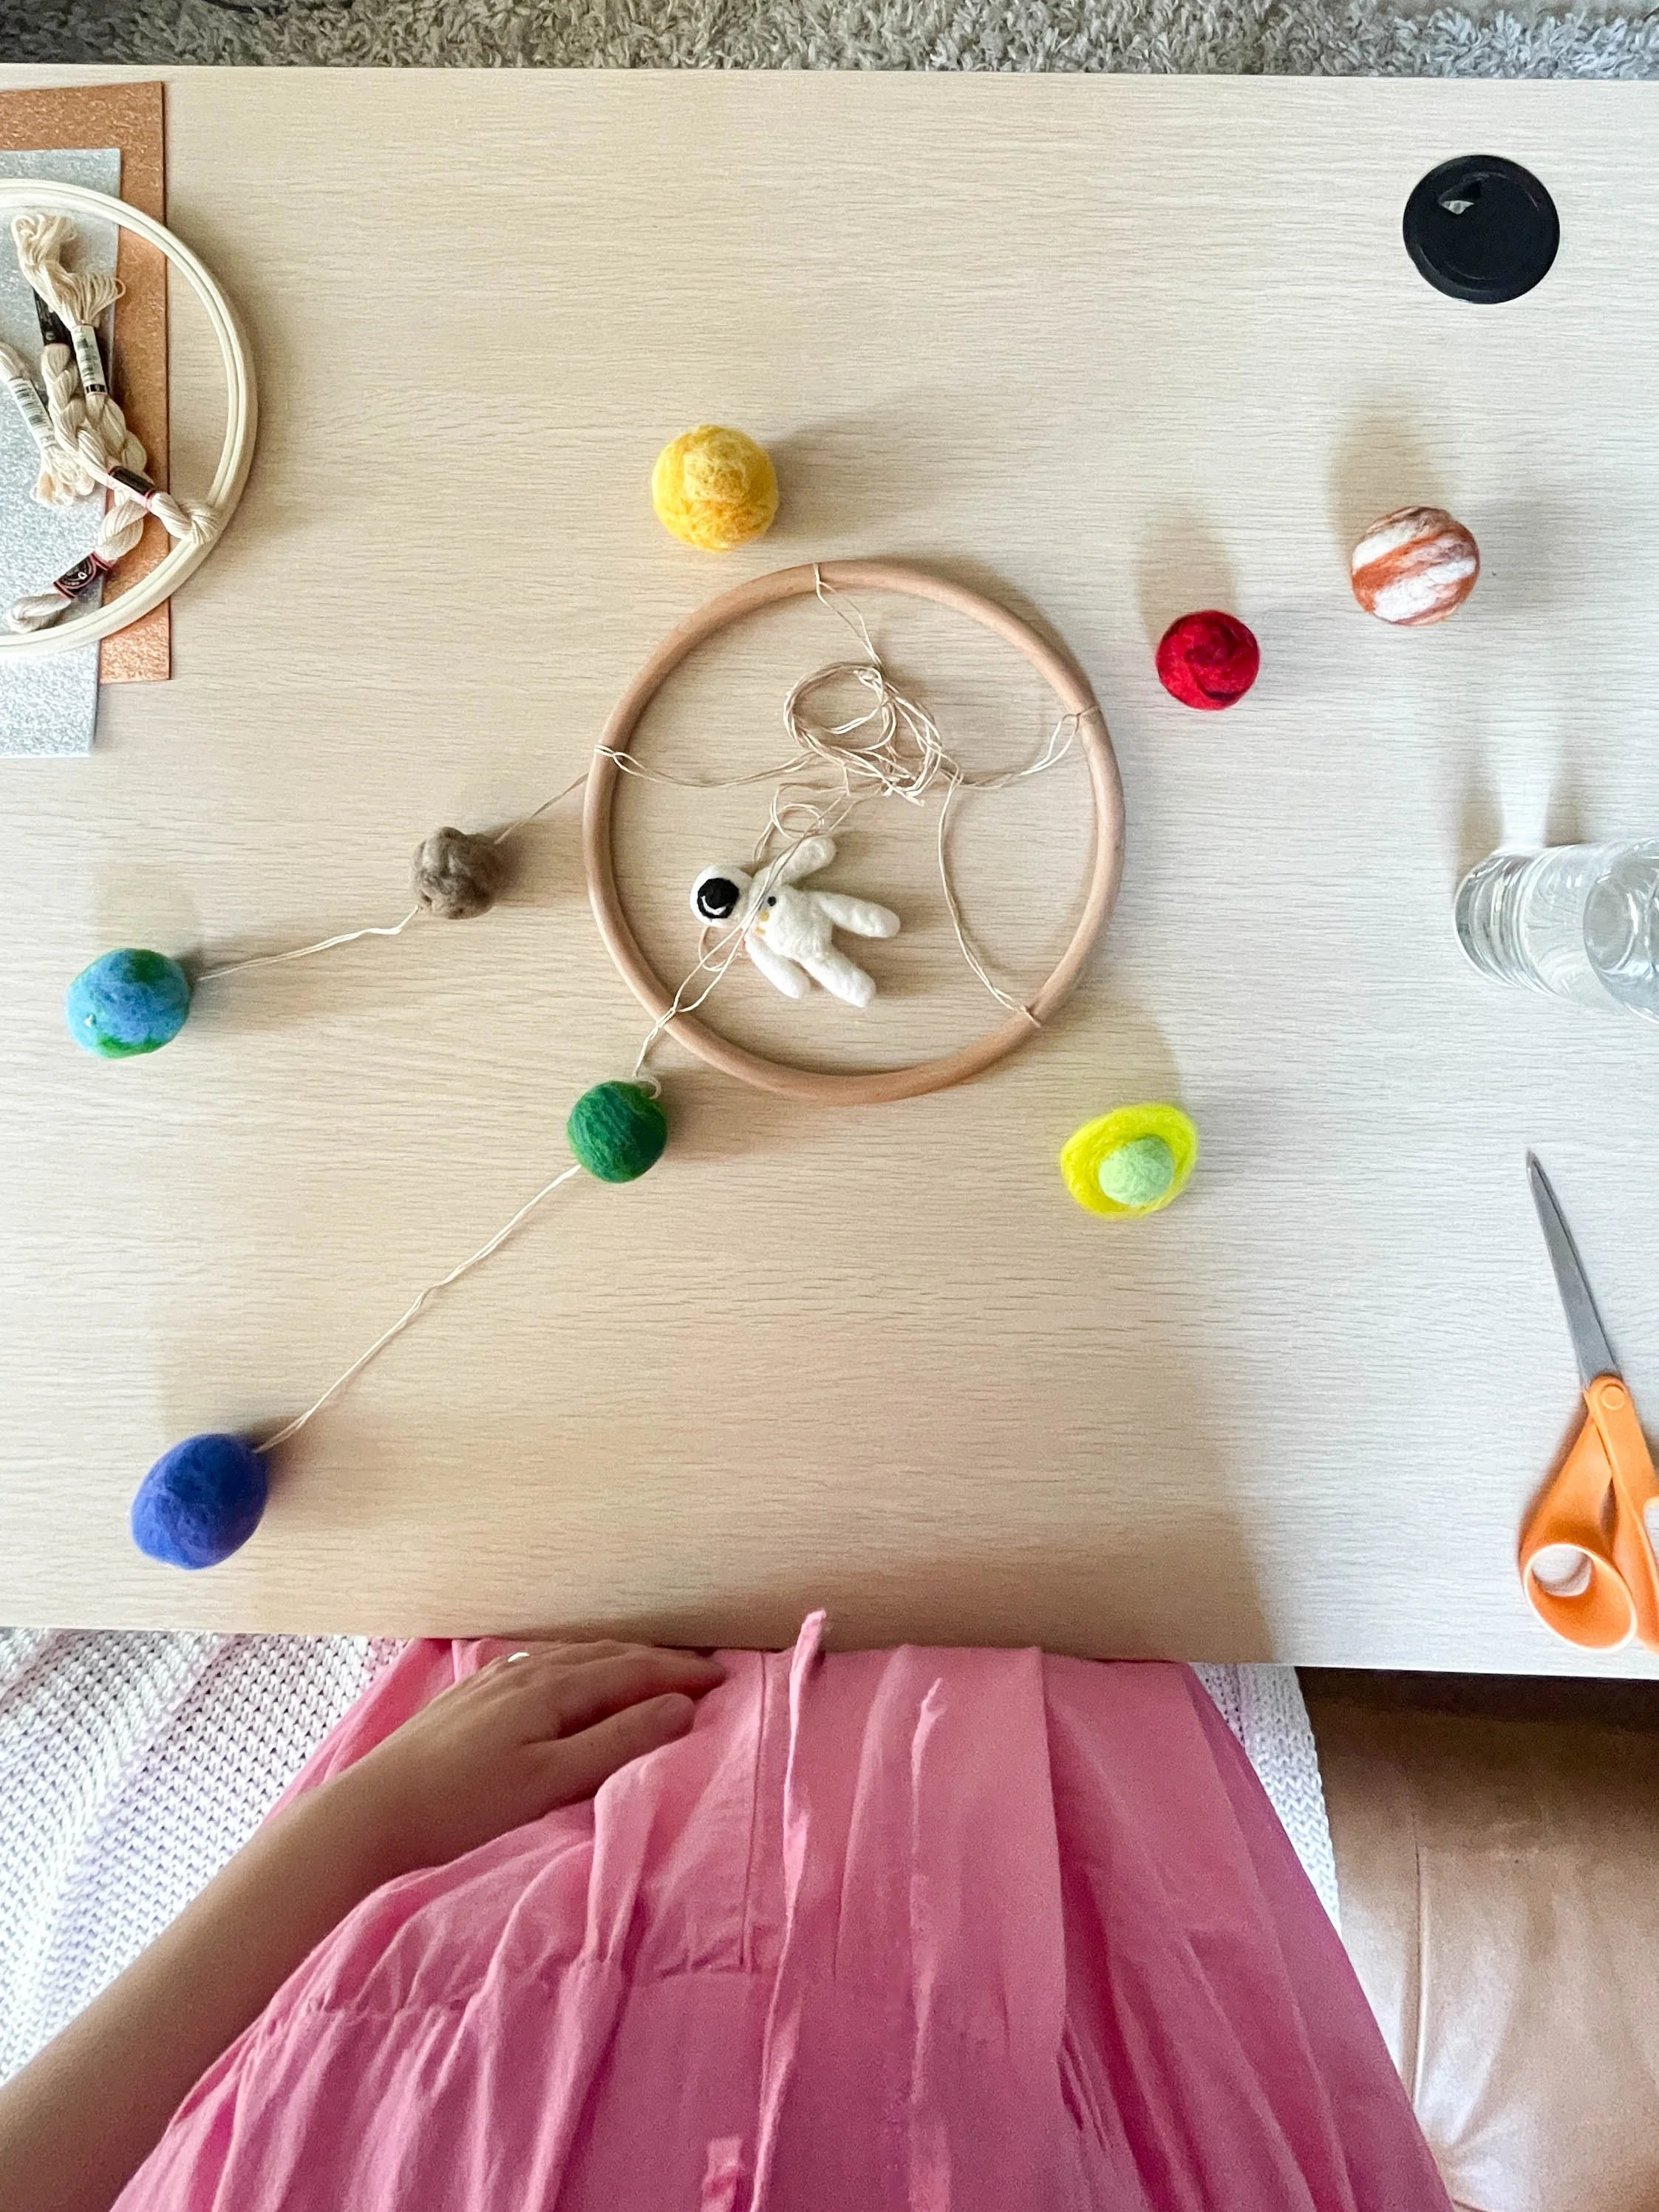
DIY Outer Space Needle Felted Baby Mobile

I’m so excited to put together an outer space themed nursery for our little guy, starting with this planet mobile! It all started because I came across this one from Crate & Barrel, and thought it was adorable, but couldn’t justify $100 for a mobile. I wondered how hard it would be to make a version myself and started down a YouTube rabbit trail about needle felting. It seemed easy enough, and I found this kit for only $28 on Amazon with all the supplies, so I decided to give it a try!
I’m so happy I did, because this mobile was so much fun to make and it turned out exactly as I was hoping! Below are the instructions for each part. It was easy once I got the hang of it, but please read the notes as well if you want to make sure not to break needles (I had one break and fling across the room when I was still learning which could be a hazard).
I have lots of leftover wool, so I’m excited to do more needle felting! I saw a really cute daisy and strawberry mobile on Etsy that I might try to recreate for a future daughter or as a gift for someone!
SUPPLIES
Needle felting kit (Needles, needle holders, wool, foam, finger guards)
Embroidery Floss (I used about 12 yards — two bundles)
Embroidery Needle
Key Ring (or however you want to hang it)
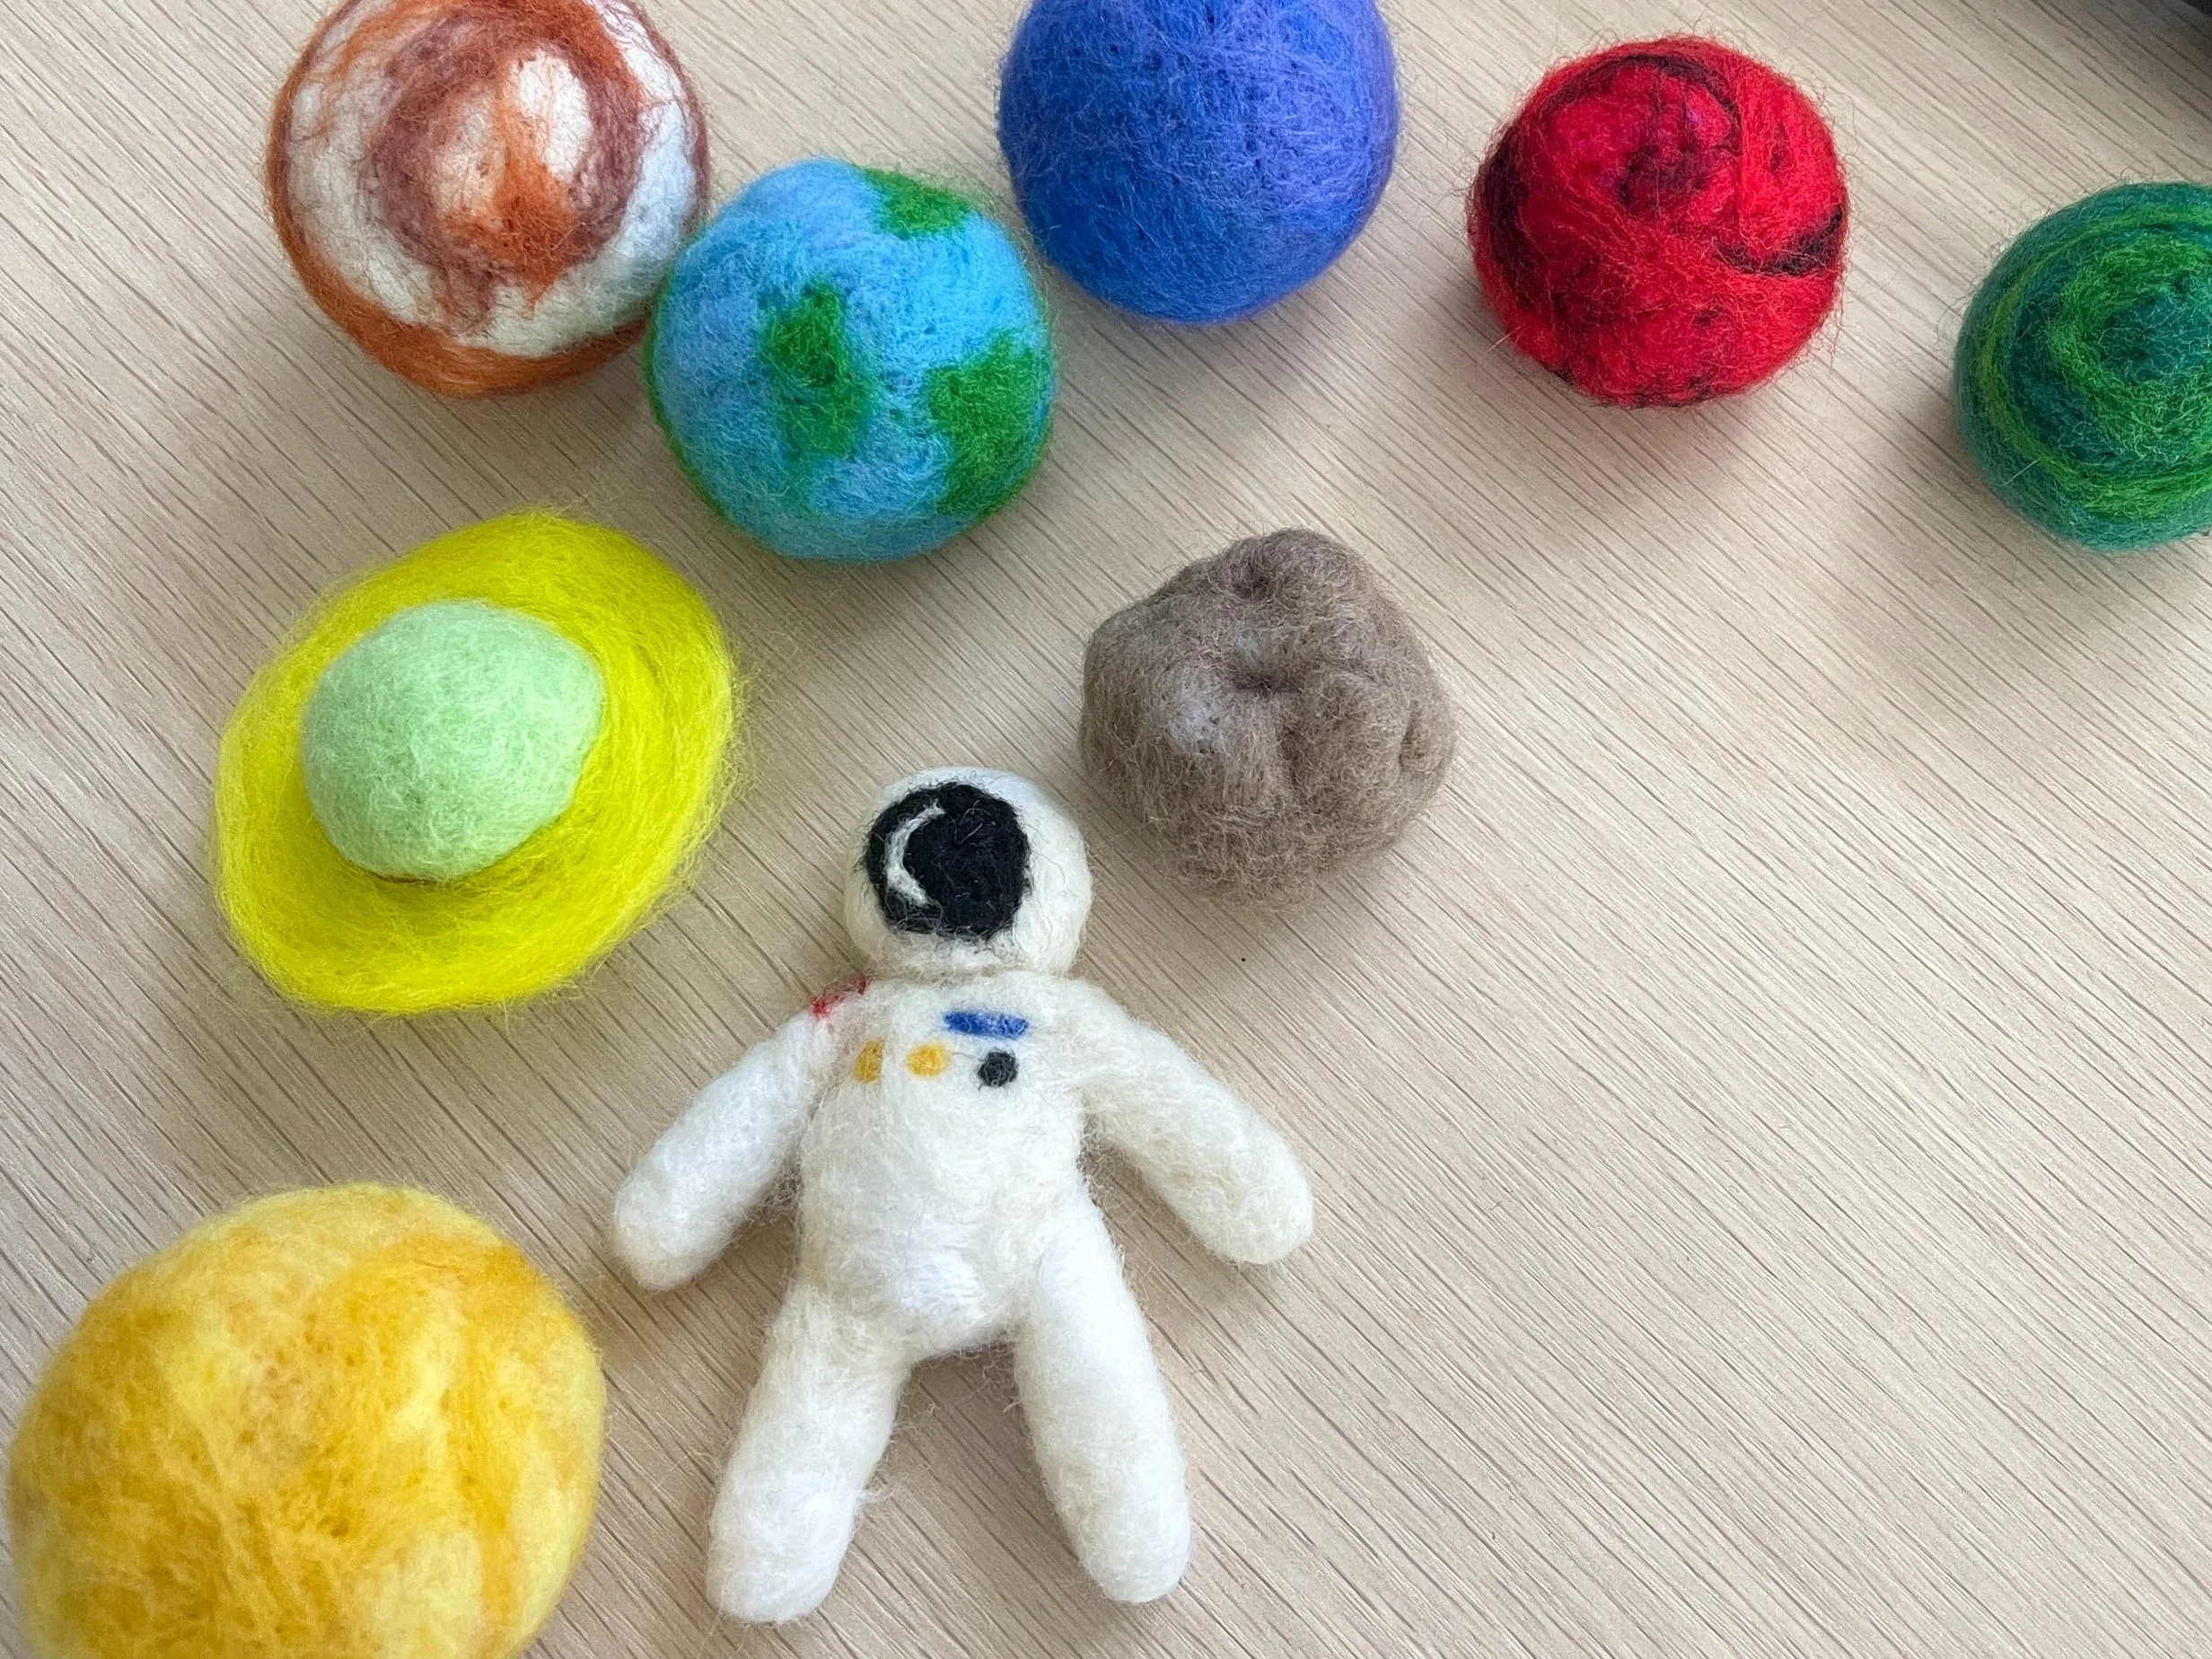
Felt Shapes:
Form the general shape you want from the loose wool — spheres are easiest if you start by tightly rolling a tube shape
Use a large needle or a holder of 3 needles (the smaller the number, the bigger the size…My largest needles were size 36) to define the shape.
Add or shape details using a thinner needle (I used size 42)

Mobile Top:
Fold 5 long strings in half (embroidery thread) around the circular top and tie each pair off with a knot just below the circle. I looped them and had double strings only so that the cut ends would be hidden in the main top knot and everything visible around the circle would look really clean.
Tie the 5 double pieces together at the top (I added the keychain holder at the end, but it might be good to just add it up front for a cleaner knot)
Add one more string in the center by tying it around the main top knot — This will hang down for the astronaut/center item
For each pendant, take another long piece of string, loop it through each of the top strings, and fold it down in half. Tie a knot at the top for a clean finish.
Tie a knot above where you want the first item to hang.
Use a traditional embroidery needle to pull each side of the string through the top of the first planet. Tie a knot below to secure it in place.
Tie another knot where you want the top of the lower planet to hang, pull the strings through the lower planet with a needle, and tie a knot below it. Cut off the excess close to the knot.
Add a keychain holder at the top if you haven’t already, and seal the knot using clear nail polish. You can also cover knots on the planets with additional felt on top if you want!
Notes:
Careful of breaking needles — sometimes they fling across the room and are hard to find and sharp, so craft in a space that you could keep track if that happens. But in order to prevent this — Use bigger needles for overall shaping and smaller needles for details. Don’t needle too quickly or force them really far into the planets. If a needle bends, stop using it and choose a new one because that usually happens right before a break! Once I followed all of these guidelines, I didn’t break any more needles.
Most of the knots in the instructions aren’t really necessary. The planets would hold overall on embroidery thread without knots, but the knots just make the whole mobile look cleaner so the string ends are less visible and the double strings don’t look messy.
Each planet I made used about 6 grams of wool, to make approximately 2 inch spheres. A lot of the kits I saw have colors that come in 3g bags, so you can either order double, or just use any extra colors you have that you wouldn’t normally include as the bottom layers/structure of the planet and then cover it on top with the color you want. Beneath my warm tone planets are sometimes bright purples or pinks that you don’t see.