
DIY MID CENTURY MODERN DESK LAMP

This year for Christmas I decided to make table lamps for my sisters! I’ve never made anything involving electricity before, and I didn’t really know how, but thankfully my dad is the king of all things circuits, wires, soldering, electricity, blah blah blah, and he was willing to help! After my dad helped me make the first lamp, I was basically able to make the second lamp on my own — giving me hope that I can make some more for my own home and hopefully explain the process well here.
I would recommend having some help from someone who knows what they’re doing if this is your first project — don’t just take my word on this step-by-step because I am not a professional and honestly don’t know very much about this! I still thought it would be worth it to share the process because it was easier than I expected. Since I had the help of a professional, we did a more complicated wiring design but here is a summary of the basic process for a simple DIY lamp:
Make/buy/assemble the main body of the lamp
Put the wire through the lamp body
Separate the two sides of the wire and screw them onto the socket
Add a plug to the end of the wire
Screw a lightbulb into the socket

the body of the lamp
This is the fun part and it’s likely the first thing you should do — just make the design of the lamp! You could do any shape you want, but I recommend something with only one bulb so that the wiring is easy if this is your first project.
We decided to use plastic tubes (as opposed to metal tubes) so that we wouldn’t have to worry about the material interfering at all with the circuit.
My dad works with acrylic quite a bit so he already had these tubes and we used a heat gun, a drill, and some glue to connect them into one piece. Then we made a base out of some scrap wood and stained it!
If you’re looking for a simpler, power-tool-free process, here are a few design ideas I found on Pinterest that might be easier to make!
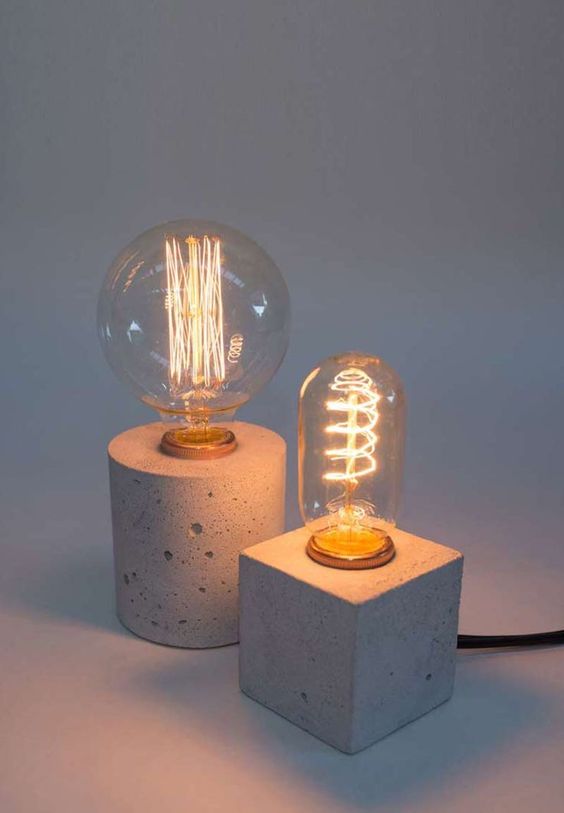
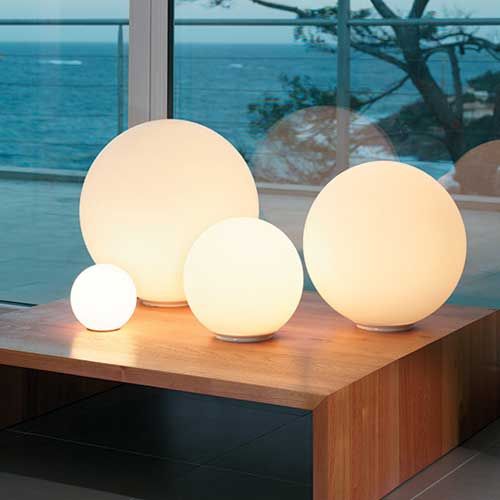
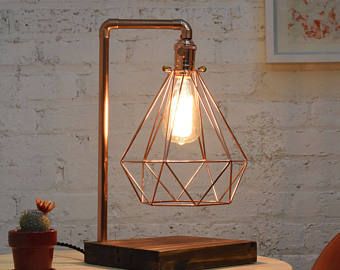
You can find vintage bulbs, globe lamp shades and cage lamp shades at Home Depot! Then just choose a simple base from things you find for a good deal and use my favorite multi purpose glue to attach things.


THE WIRING
The wiring is the part I was most intimidated by and kind of thought I would likely burn down the house if I tried this on my own, but it was actually pretty easy once I knew how.
Basically, you just thread the wire through the body however works to get it from where you want to plug it in to the outlet, up to the light bulb, and then you separate the two sides right at the top where you will connect them to the socket.
This wire linked here is a good one to use.
After you separate the two wires from each other at the ends, just cut off the plastic part so that the wires are exposed.
Then tuck the exposed wire underneath the screws on the socket — one wire on each side of the socket, and tighten the screws to secure the wire in place. Most wires are color coded to make it easier… just match the nickel (silver) wire to the nickel screw on the socket and the copper wire to the copper (or brass) screw on the socket.
I would recommend checking out some YouTube videos to see how this is done (it’s really easy!) This video linked here explains it pretty well.
Finally, use the same exact method to attach a plug to the end (this is also shown in the video linked above!)
Once you have the socket and plug attached, all that’s left to do is screw in the bulb and voila!


I don’t feel like I’m quite experienced enough with this type of project to confidently teach someone else yet, but I share this all because it was all so much easier than I expected, and I do feel like making just one project taught me all the basics I need to know to make more on my own. So if you’ve ever had an interest in making your own lamps, I would watch some YouTube videos or ask some friends and try to learn, because you can totally do it!
If you’re not ready to give this project a try yet, here are a couple of other easier options for the untrained hand:
These simple pendants from Target are amazing — only $7.99, its all the wiring done for you, and it’s battery operated, so you can just make a fun base or design around it and hang it anywhere! Pretty much no risk involved here unless you cut the wire (don’t do that, haha). It comes in different colors too.
Here is basically the same thing, but it’s from Home Depot and you have to add your own bulb, and it plugs in (not battery operated) so you’ll feel more talented. Urban Outfitters has a cuter version of this too.
You can always use other types of battery operated lights, like these stick-on, color-changing LED strip lights.
Let me know if you try making your own lamp! I would love to see your pictures!