
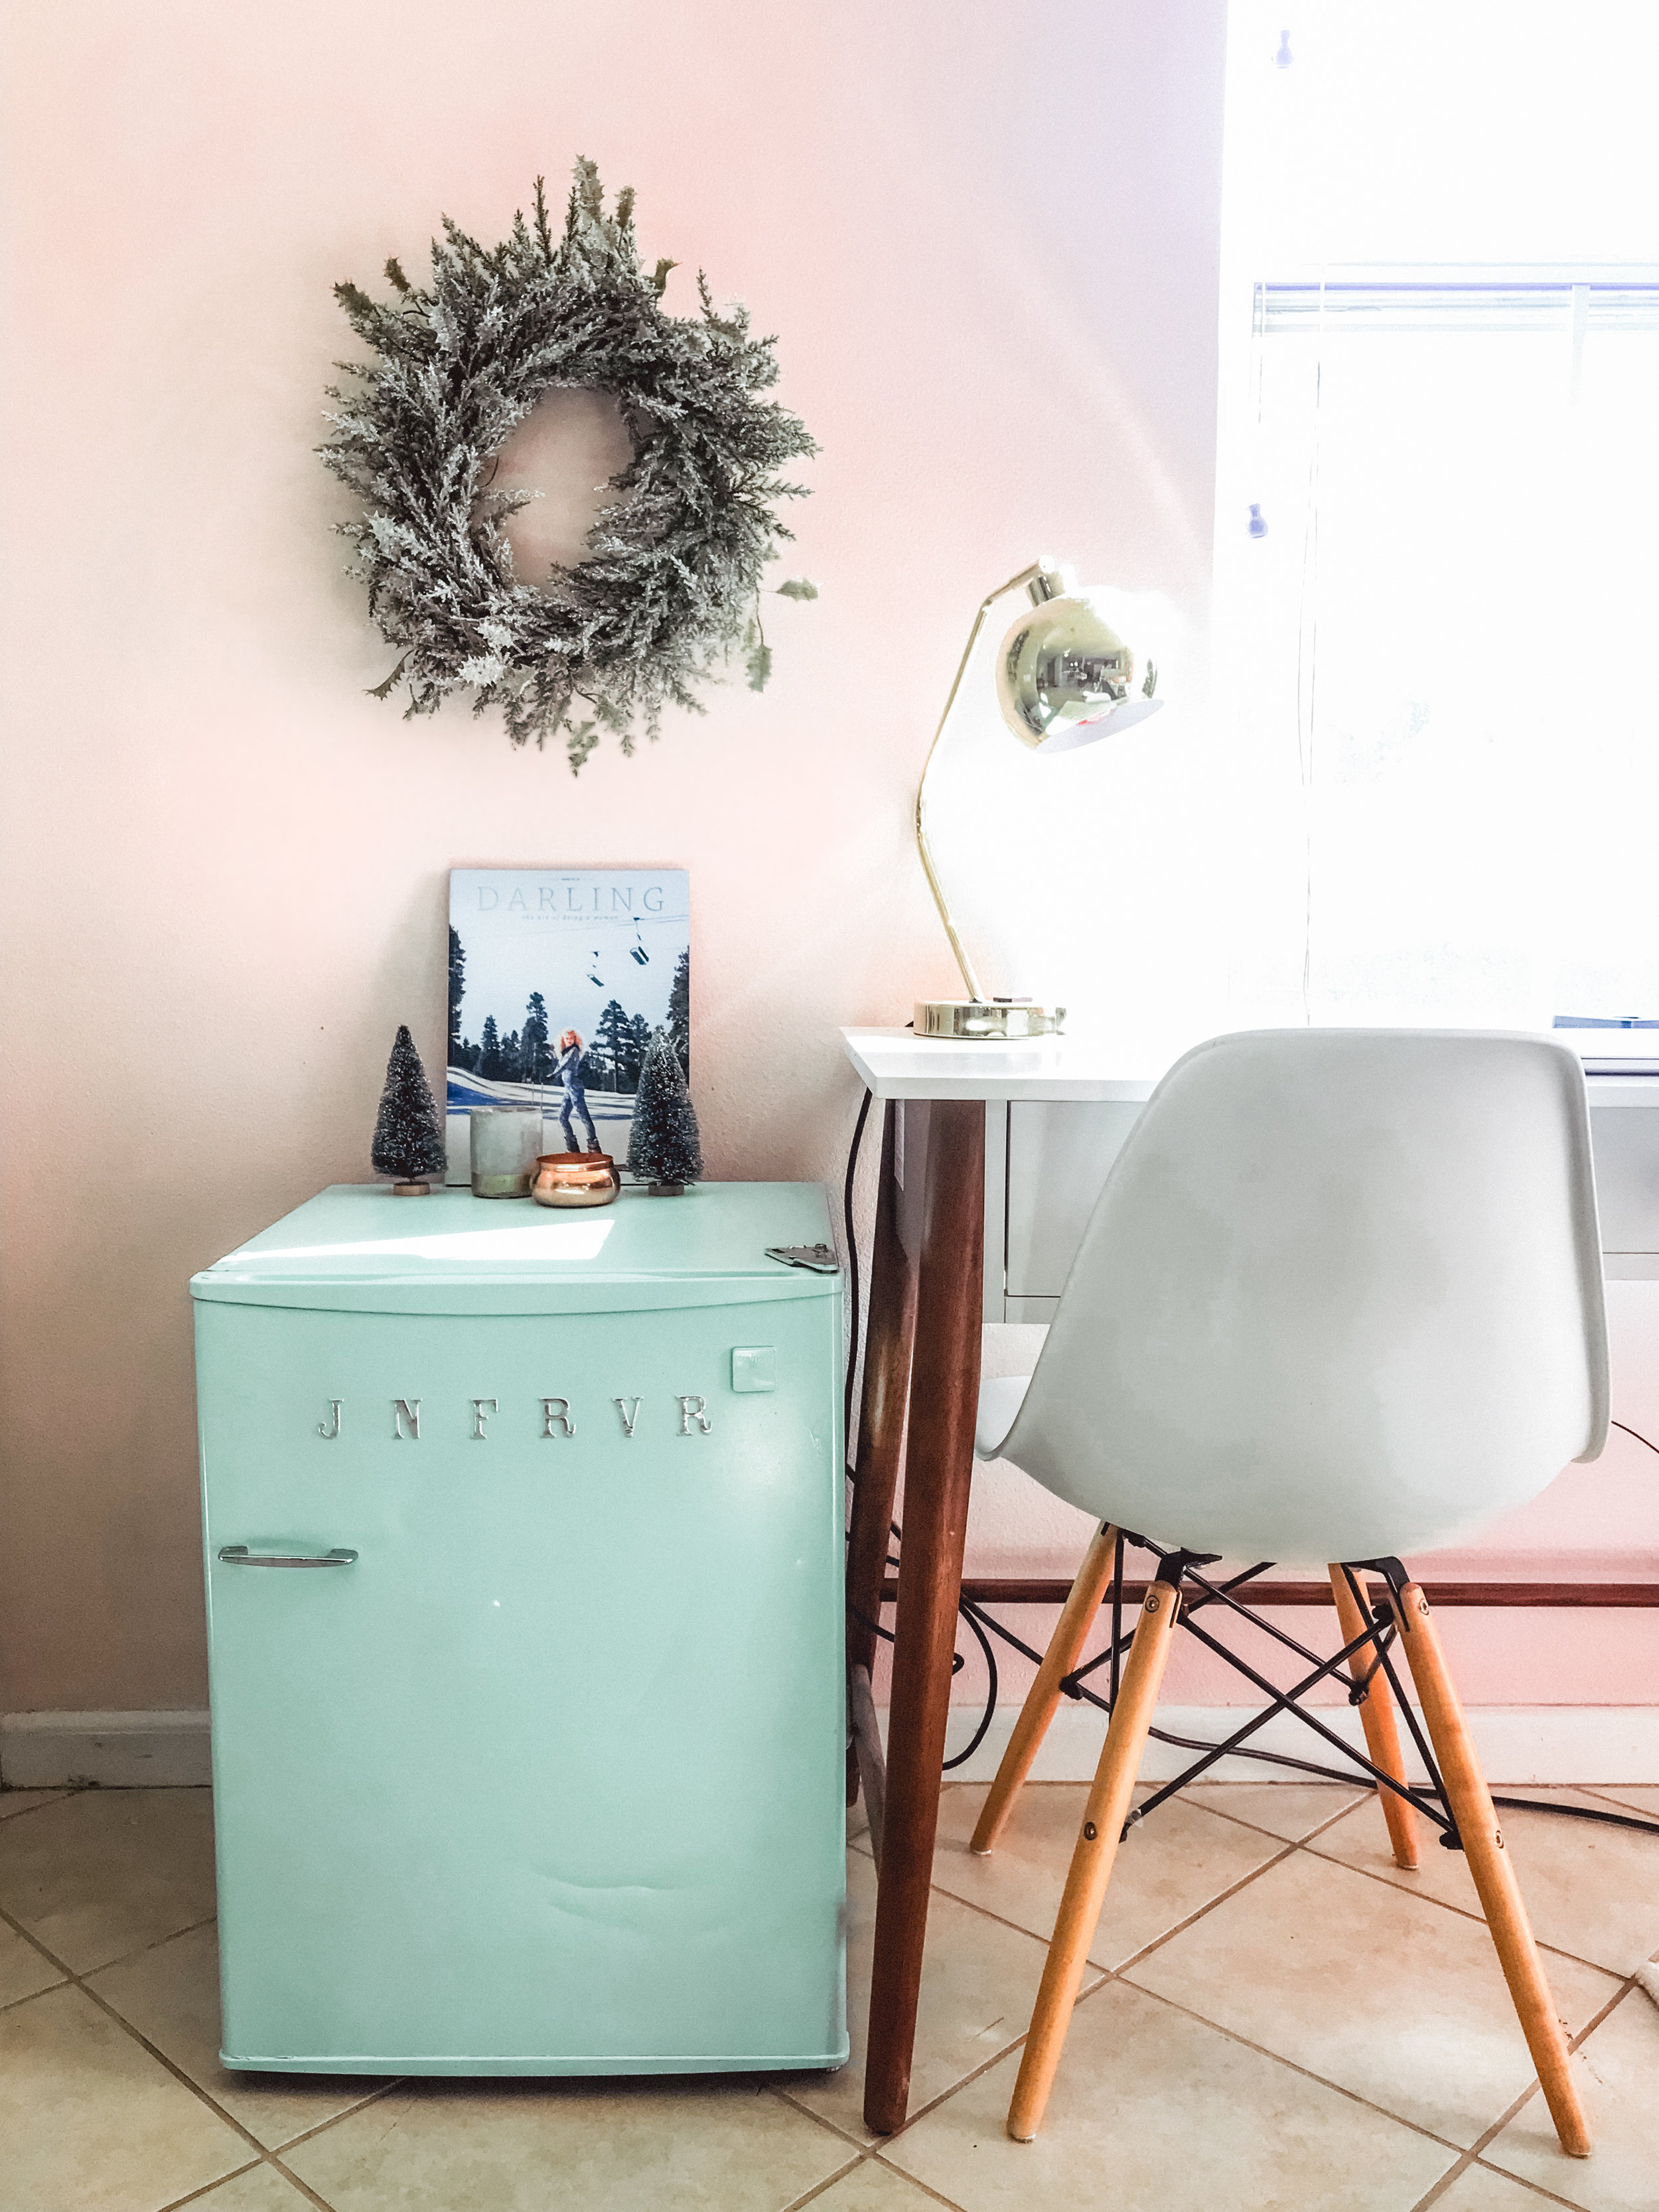
DIY RETRO MINI FRIDGE ($9!)
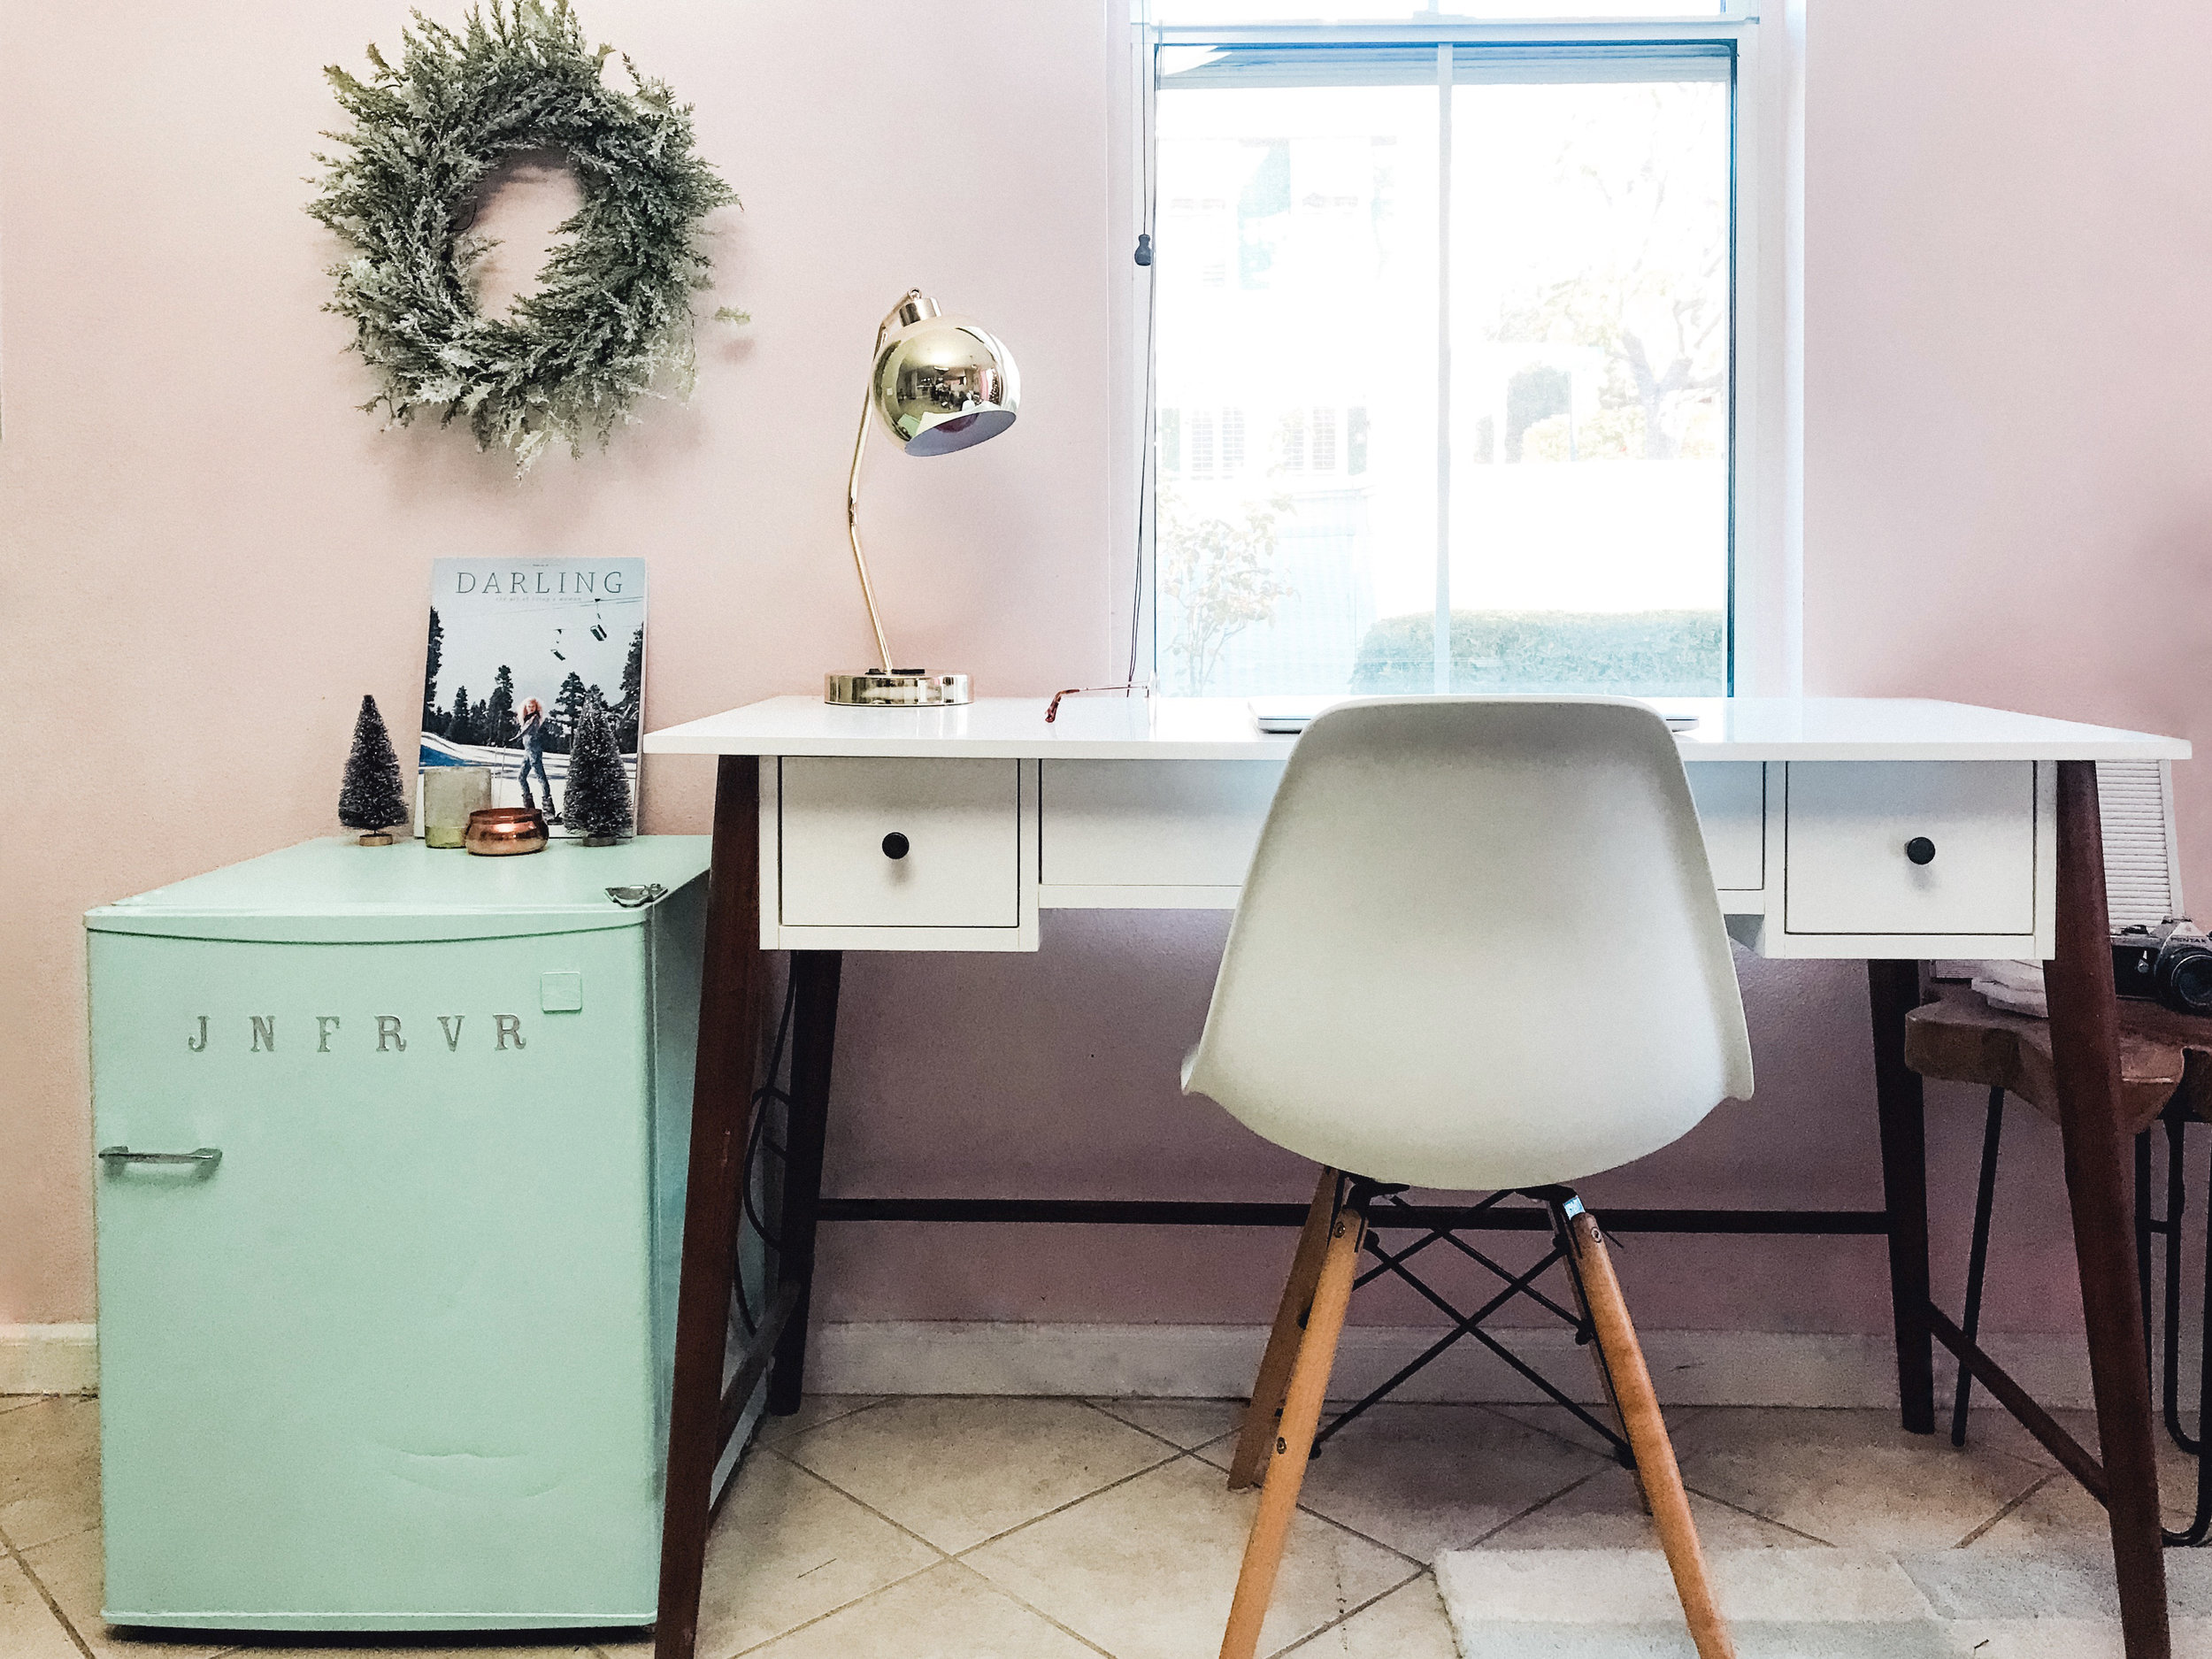
I finally did the DIY I’ve been dreaming of for the last couple of months — I transformed a boring mini fridge into a retro-style pop of color! I have wanted a little turquoise fridge ever since they started trending a couple of years ago, and our very regular late night snacks (does 3am count as “late night”?) means we actually needed one, right?
My dream mini fridge is this one from SMEG but three 9’s in a row ($999) is a v painful number. Thankfully, I found a way with only one 9 because this DIY actually cost me a total of NINE DOLLARS.
(I already owned the glue and painters tape… so it would have been $15-20 if I had started with literally zero material at home)

The before — normal (boring) fridge
One of my friends got this fridge for free a couple of years ago and passed it to me for free as well! It has a couple dents on the outside but works perfectly.
STEP 1: SPRAY PAINT
I found this Rustoleum spray paint at Home Depot and it was the perfect color and gloss. It’s supposed to have extra coverage, and I think it really did because I only needed one coat of paint. It took almost exactly 1 can to cover the fridge. I sanded everything down before painting — just a light sand to scratch up the gloss so that the paint would hold better, and I taped up the back of the fridge since it was open to make sure I didn’t spray all over the wires, etc back there. I also taped the power cord and the one metal hinge on top that I wanted to remain silver. Besides that, it was the easiest paint job ever, because I didn’t have to flip it over or do a second coat or anything — just sprayed it once and done!


STEP 2: LETTER STICKERS
This was actually the hardest part of the process!
I got these letter stickers from Michaels. They’re a nice shiny silver and they’re slightly raised, so they’re fairly convincing as real metal pieces. Michael’s had lots of options. I picked these because I wanted all caps and I wanted a clean font that wasn’t too bubbly looking. One brand of stickers I saw there that had great options was called “Thickers.” I really liked their fonts but my store was all out of Thickers in silver, so I went with these!
The stickers I got came on a clear film, which was super helpful so that I could place them on the fridge to see how it looked without fully sticking them on yet and risking ruining the paint if I removed them. They sort of suctioned on there and I tried out a few words. I thought “COLD” or “COOL” would be kind of funny and cute, but I felt like if you could read the word right away it became more obvious that it was a DIY and I want it to be something that blends in as a legit high end fridge — not a “craft.” Because of that I wanted to go with letters that wouldn’t draw too much attention and would be sort of ignored as the company name. I ended up going with “JNFRVR” for “Julie & Nathan Forever” (awwww!).
The challenge was getting them all perfectly lined up! They stuck on pretty well, but I wanted to actually glue them on so that there’s no risk of them falling off later on. I used this glue which is way stronger than necessary but I already had it out to use on the handle (step 3!).

STEP 3: HANDLE
I had no idea it would be so cheap to find the perfect handle for the fridge door! I planned to spray paint part of a copper tube silver since I already owned a tube I could use, but when I got to Home Depot I realized they had some great cabinet pulls in the hardware section for less than the cost of spray paint. This handle was $1.78! I can’t seem to find a link to the exact handle I got, but they have lots of options online and in stores, and many, many of them are less than $5.
I don’t have much experience with drilling into metal, so I decided to just glue this handle on. I recently discovered this amazing glue called “Rapid Fuse." It works on almost any material and it cures in 30 seconds. It was a little intimidating at first (The bottle says “bonds skin instantly” lol!), but I’ve found it to be the perfect material for so many projects where glue is easier than a power tool! I just wear gloves when I use it to be safe.
Even though it’s supposed to cure in 30 seconds (and fully dry in 30 minutes), it wasn’t able to hold the weight of the handle after just 30 seconds. It was falling off, so I just put the fridge on it’s back so that gravity would hold the handle onto the fridge. That worked perfectly and after 30 minutes it was hardened on there for good!

I think this is one of my favorite DIYs I’ve done because it’s a huge return on investment — I spent $9, it took only 3 really easy steps and in the end I have a working, super cute mini fridge that’s very similar to one I’ve wanted for years. So happy with how this turned out.
If you’re not so lucky to have a friend give you a free ugly mini fridge — I’ve found that usually mini fridges go for around $50 on Craigslist, Let Go or other sites/apps like those! You could even get a non-working fridge for much less and use it as a hidden cabinet or something.
Hope you enjoyed this DIY — let me know what you think in the comments. I will be posting more on YouTube along with the rest of my bedroom renovation process.
TIPS FOR HARDWARE-STORE-A-PHOBIA:
